Eric,
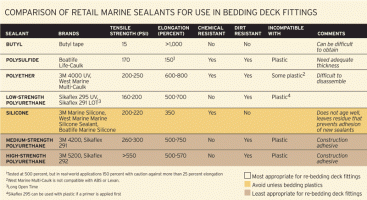
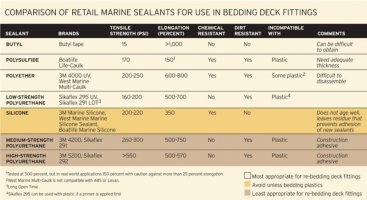
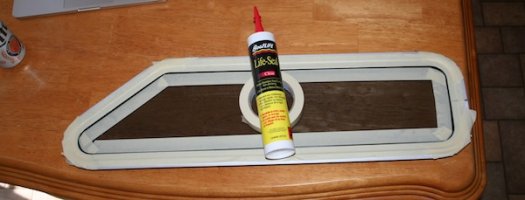
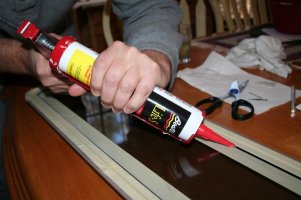
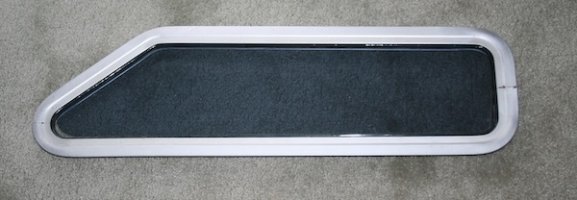
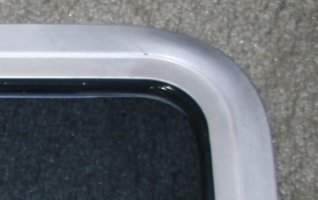
Yes, doesn't seem very robust but that's the attachment. I suggest laying a heavy bead of Life-Caulk into the gap. It's a caulk not an adhesive. There is no reason to use a strong adhesive.
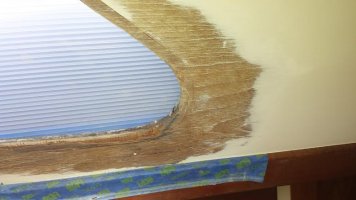
Take a look through my report, here. You may have a similar teak laminate issue.
http://www.ericsonyachts.org/infoexchange/entry.php?121-Portlights-and-Veneer
Yes, doesn't seem very robust but that's the attachment. I suggest laying a heavy bead of Life-Caulk into the gap. It's a caulk not an adhesive. There is no reason to use a strong adhesive.
Take a look through my report, here. You may have a similar teak laminate issue.
http://www.ericsonyachts.org/infoexchange/entry.php?121-Portlights-and-Veneer