Need help pulling shaft

907Juice

Continuously learning
UPDATE! Need some help

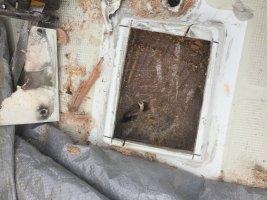
So I cut out the bad chunk of wood under the mast and banged around with a hammer and drilled a couple pilot holes. The core seems hard and still in tact. FWEW! That should be an easy fix.

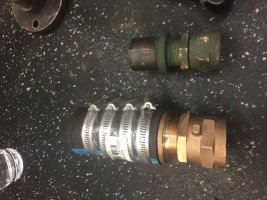
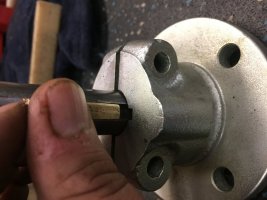
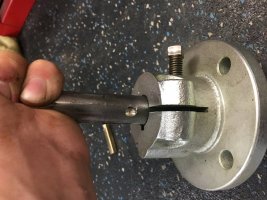
My problem is- I cut off the nuts to the prop shaft flange and everything seems to be ready to separate but they won't come apart. I tried tapping the flange with a hammer and tapping the seam with a screwdriver but it won't break free. People have recommended grinding the flange off and moving on but I'm confused on where/what to grind. Please be specific. I've attached a few pics. The part I ordered is only the prop side of the flange. The transmission side of the flange looks like it attaches inside the transmission so I'm afraid to cut it off. Should I get a bigger hammer/chisel and bang harder on the seam, or is there a better way to split it?

And help is appreciated!
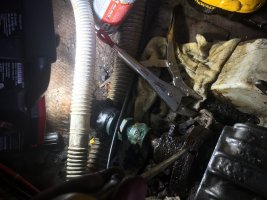
IMG_4039.jpgHow things look now.


IMG_4040.jpgHard core under the crack.
 

tenders

Innocent Bystander
Nuts on the prop shaft flange? Hmmm, on my boat the flange bolts pass through the (unthreaded) shaft coupling and screw into threaded holes on the engine coupling. No nuts, and the heads of the bolts are on the aft side of the shaft coupling - it would be difficult to fit the bolt into the hole from the engine side anyway, even if the engine side weren't threaded.

If you ground off the heads of the bolts then it's possible that there is still a little bit of bolt shoulder holding the couplings together? Or corrosion has formed around the hole, gripping the remaining part of the bolt?

To cut that coupling off, run a Sawzall with a bi-metal blade from aft to forward, with the cut running parallel to the shaft. Do a few cuts around the shaft, a bit like peeling a banana. Avoid hitting the shaft and avoid slicing into the engine coupling. At some point the coupling is just gonna fall off, nothing except those bolts hold it to the engine coupling.
 

907Juice

Continuously learning
Nuts on the prop shaft flange? Hmmm, on my boat the flange bolts pass through the (unthreaded) shaft coupling and screw into threaded holes on the engine coupling. No nuts, and the heads of the bolts are on the aft side of the shaft coupling - it would be difficult to fit the bolt into the hole from the engine side anyway, even if the engine side weren't threaded.

If you ground off the heads of the bolts then it's possible that there is still a little bit of bolt shoulder holding the couplings together? Or corrosion has formed around the hole, gripping the remaining part of the bolt?

To cut that coupling off, run a Sawzall with a bi-metal blade from aft to forward, with the cut running parallel to the shaft. Do a few cuts around the shaft, a bit like peeling a banana. Avoid hitting the shaft and avoid slicing into the engine coupling. At some point the coupling is just gonna fall off, nothing except those bolts hold it to the engine coupling.


It looks like you have the prop flange and the transmission flange married together. They were held together by a bolt slid through unthreaded holes aft to forward and connected to nuts. I cut off the nuts and just pulled the bolt off. Now it seems everything is just held together by corrosion and rust. In another forum they recommended running a sawzall at the seam to make a purchase with a fresh chisel. I'm going to softly tap along the seam hoping to bust the connection. I've been giving it a pb blaster bath every couple days for about the last week or so. Hopefully it'll finally yield... If that fails I may try and heat/cool it or cut it. Honestly I'm kinda working slow and the least invasive as possible. I don't wanna get hasty and start breaking more things.

Im hoping to get over tomorrow and give it a go but the wife may have other plans... we will see. I'll let you know. Thanks for the help tenders.

Juice
 
Last edited:

tenders

Innocent Bystander
If you're positive you have all the bolts out of the picture, maybe grab the engine coupler with a carefully-placed vise-grip or pipe wrench, hold it in place with another person or against the hull, and work the prop back and forth a bit from outside the boat? Tap the prop back a bit with a sledge or mallet? GENTLY. If the coupling is going to be expended anyway, why not slice it?
 

kapnkd

kapnkd
I installed a Lasdrop many years ago too and will be replacing it with a regular shaft seal with Teflon packing if and when I have to remove my shaft again (which is hopefully never).

I never really trust those face seals, which will leak if schmutz (like the rusty gravelly dust that collect in the engine bilgewater) gets between the faces, and the rubber bellows are susceptible to bad things happening to them if they get soaked in solvent...like gasoline, which dissolved mine when my fuel tank sprung a leak in early spring. Fortunately it was before launch, so the boat didn't sink at the mooring, but it easily could have.

Sorry for the late reply, but 2 birthdays and a road trip slowed me down considerably.

I was surprised and sorry to hear of your problems with the Last Drop. The first Last Drop we installed went for over 20 years and was still working without incident. Last year we felt the spring tension was not as good as it once was so decided to put a new one in. Given the newer traditional stuffing boxes use Teflon, I can imagine a huge difference over the old wax methods. Please do keep me and the rest of us updated with how well it does for you. Good luck with your ambitious project(s).
-kerry
 

907Juice

Continuously learning
Eureka!

After a hard fought battle the shaft finally succumbed. I'm pretty sure I won because I was more stubborn than it was. For the most part I took a sawzall and cut down the seam an Eighth of an inch all the way around and wedged it with a chisel. It took a little bit of everyone's advice to get it off but it finally broke. The motor mounts all came up easily and the shaft slid back so nothing else seems seized. Thanks all. Now onto the rest of my projects.

Juice
 

Rocinante33

Contributing Partner

Juice,

Sorry to be late to reply. I did this job at the beginning of the year.

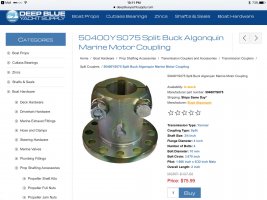
Yes that is the coupling you want which is the short, 2" version. Be aware that when they say, "split" they don't mean that it is two piece. It is one piece with a split down the side which when tightened together with bolts and nuts will grip the shaft well.

Buck Algonquin gives great customer support. Deep Blue Yacht Supply and Marine Hardware are the two suppliers I used and they had good customer support as well.
 

907Juice

Continuously learning
Juice,

Sorry to be late to reply. I did this job at the beginning of the year.

Yes that is the coupling you want which is the short, 2" version. Be aware that when they say, "split" they don't mean that it is two piece. It is one piece with a split down the side which when tightened together with bolts and nuts will grip the shaft well.

Buck Algonquin gives great customer support. Deep Blue Yacht Supply and Marine Hardware are the two suppliers I used and they had good customer support as well.

Yeah I just got it today and thought it was weird the two piece flange was only one piece. I was looking at it today and wondering how it would work. Oh well it is what I bought but for the extra $30 I woulda thought it was actually two pieces.
 

supersailor

Contributing Partner
I am looking at a flexible coupling also. I'm adding a PSS shaft seal and there's not much space for a coupling there. Have any 34-2 Vikings been able to stuff a flexible coupling in that itty bitty space?
 

Loren Beach

O34 - Portland, OR
Senior Moderator
Blogs Author
Shaft Concern

One primary piece of information is the actual distance between the trans flange and the front section of the shaft alley. I sort of recall that vendors like PYI have listed a minimum distance in inches for their PSS, and then there would be the added setback for the flex donut.
I am thinking about also adding a 'donut'. (I prefer apple fritters in general, but this is a special donut situation!)
:)
We have the PSS, installed about 1995. We have replaced the bellows once, as a general precaution. Really like a dry bilge.

Note B: inserting that nifty-sounding "donut"will likely require shortening the shaft. There is a need to keep the portion extending past the end of the strut bearing down to about 1.5 X the diameter of the shaft. For instance, we have just enough room behind the strut for our razor toothed disk-shape line cutter.

Loren
 

907Juice

Continuously learning
Cutlass bearing

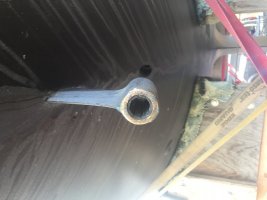
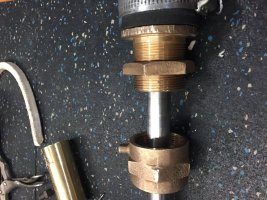
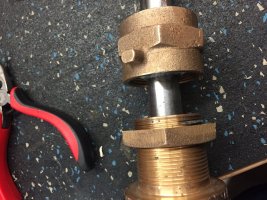
Hey guys, I've been reading a bunch of forums and have a pretty good idea on how I'm going to get it out. I'm pretty sure the strut is metal but I'm not quite sure and wanted to check. Here is a pic for reference. Also, for my reference, did the packing glands get bigger and better like everything else, or did my boat have the wrong one in general? The working parts are the same size. It is just thicker.
IMG_4104.jpg
IMG_4085.jpg
 

kapnkd

kapnkd
You are correct, the struts are usually of bronze. Sounds like you're on top of removing the cutlass bearing procedure wise - but be ready to use a lot of patience and most likely some four letter words before all is said and done! It depends a lot on how long the old one has been in there.

The first cutlass bearing I had to replace had to be "CAREFULLY" cut/sectioned out with a hacksaw blade. Trying to not damage the strut and loosen the bearing involved a LOT of verbiage and beers!

Not sure about the sizes and what to tell you. MOST importantly, IF - the new kit fits your shaft size and they supplied you with the correct packing materials - you should be ok(???).

The real fun fun begins when you need to replace the strut itself! (Prayer Helps!!) ;-))
 
Last edited:

907Juice

Continuously learning
You are correct, the struts are usually of bronze. Sounds like you're on top of removing the cutlass bearing procedure wise - but be ready to use a lot of patience and most likely some four letter words before all is said and done! It depends a lot on how long the old one has been in there.

Not sure about the sizes and what to tell you. MOST importantly, IF - the new kit fits your shaft size and they supplied you with the correct packing materials - you should be ok(???).

The real fun fun begins when you need to replace the strut itself! (Prayer Helps!!) ;-))


I already trial fit the gland and it fits perfectly. It is just the outside diameter that is much thicker and bigger. I'm 90% sure it is the original bearing. Much like the rest of everything else....
 

Alan Gomes

Sustaining Partner
This video just blew my mind... is it really this easy? No cutting, no metal fabrication? Just some washers and all thread...

https://m.youtube.com/watch?v=05U2WV2Jn_8
Yeah, removing the bearing really was that easy. Of course, that method requires you to have the shaft already out. We removed the old shaft in a few minutes because we were replacing it and just cut it with a cutting wheel on a grinder. It was a bronze shaft that cut like butter!
 
Last edited:

907Juice

Continuously learning
Yeah, removing the bearing really was that easy. Of course, that method requires you to have the shaft already out. We removed the old shaft in a few minutes because we were replacing it and just cut it with a cutting wheel on a grinder. It was a bronze shaft that cut like butter!

Yeah I have the shaft out and am going to try that instead of some of the other methods I've seen. All the other methods I've seen required some cutting and/or fabricating a metal device as kind of a modified bearing puller of sorts.

Thankd dude!
 

907Juice

Continuously learning
One step forward three steps back...

Problem 1- the key on flange is wrong size. How bad would it be if I got the smaller key and used it in same spot? I was thinking about cutting down the top of the key so it would fit wide bottom and perfect fit up top. Take one or both pieces to a machine shop and say fix please...
IMG_4121.jpg

Problem 2- set screw. The old flange had two set screws quartered from the key. The new flange has it on the half. Does it matter if there isn't a dimple to hold set screw? Should I create a dimple?
IMG_4123.jpg

Problem 3- packing. The specs for the packing I bought says to use 3/8 packing. But I put 2 rings in and am unable to get a third ring in. I tried all the tricks to include screwing it down every time and repacking. The third ring is flush with the threads. I got a section of 5/16 from a friend and used it for a third ring but it doesn't leave very many threads. In addition it worries me for a number of reasons including mixing packing sizes. I'm not sure how to address this issue. Make all 3 rings 5/16, or leave 2 rings of 3/8. The stop nut is how far it bolts in.

IMG_4126.jpgWith 2 rings 3/8 IMG_4125.jpg2 rings 3/8 and 1 ring 5/16
 
Top