Guest viewing is limited

E-32-2 thru hull replcement question

ChrisS

Member III
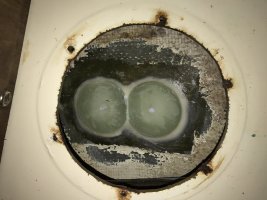
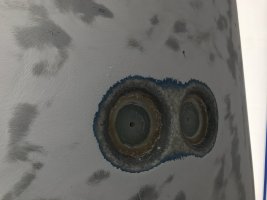
I'm hauling my boat in a couple of weeks, and I have a failing wooden backing block on one of my two 1.25" cockpit drain thu hulls. Both look to be original, and they are not proper seacocks, but inline valves threaded to the mushroom head thru hulls. I have decided to replace the two thru hulls and install proper seacocks. The Compass marine site has a great tutorial about this.

If memory serves, the thru hull fittings on the outside of the hulls were flush to the hull.

My question: in looking at various brands of thru hulls, I see that most are not flush fitting, but mushroom shaped. Once I remove the old thru hulls, how to I fair the surface to be able to have a tight fit if I cannot find the exact same thu hulls?
 

toddster

Curator of Broken Parts
Blogs Author
The only case where that issue arose for me was with the new depth sounder. Since the new transducer was larger than the old, and had a mushroom head, the old chamfer was simply eliminated by enlarging the hole.
I don't think that would necessarily work for the plumbing through-hulls, since they all seem to have the same "head" diameter, regardless of pipe diameter. Hopefully it's a standard size. At the last haul-out, I just let the old ones ride and replaced the gate valves with ball valves.
 

bigd14

Contributing Partner
Blogs Author
I just pulled the depth sounder and speed log and found that they were originally flush mount but had been replaced with newer airmar flat transducers. They barely fit over the recessed areas. Furthermore, the bedding compound was beginning to fail under one of them and the plywood backing plates were toast.

I cut some G10 backer plates with a hole saw and installed them using a bolt to center them in the middle of the existing holes. When that cured I filled the recessed areas in on the hull outside with many layers of 1708 biax. I did not bother sanding a 12:1 bevel since the buildup of material is not going to be structural. The hole saw holes will be used to recut the transducer holes and will leave a donut of backer block on the inside and a small ring of fiberglass on the outside to support the transducer thru hull flange (I'll sand the newly installed fiberglass flush first).

Backer Blocks in v berth
IMG_1771.jpg

Recessed areas cleaned and sanded
IMG_1834.jpg
 

markvone

Sustaining Member
Chris,

I replaced a flush Signet speed transducer with a mushroom Airmar. The diameter of the Airmar going through the hull was larger than the original Signet so I had to re-drill a larger hole where the existing Signet fitting was (see post #6 here: http://www.ericsonyachts.org/infoex...an-already-cut-hole-too-large-for-a-drill-bit

The new mushroom Airmar was just bigger than the max diameter of the Signet at the outside hull skin but the existing cut through the hull for the Signet was tapered for the flush fitting (not 90 degrees) so that a triangular shaped annular piece at the perimeter of the new cutout (outside the pencil line in the picture) was missing. I used thickened epoxy to fill this gap. I waxed the new Airmar fitting and inserted it into the new hole to serve as a mold while the epoxy cured. Blue tape the hull outside the perimeter of the fitting and minimize the excess epoxy to avoid having to cleanup cured epoxy. The end result was a larger diameter hole with a 90 degree edge. I've got a few detail pictures at home that I can add tonight.

FWIW,

All my original (1981) thru-hulls are flush Marelon. I replaced the original 3/4 engine cooling intake TH and the new Forespar Marelon TH was an exact match. All the original flush TH that are ABOVE the waterline on the E36RH were covered by gelcoat by Ericson at the factory which adds another level to their replacement.

Mark
 

Attachments

  • IMG_1765.jpg
    IMG_1765.jpg
    78.9 KB · Views: 104

markvone

Sustaining Member
Here are the pictures of the epoxy fill of the void to convert a beveled hole for a flush thru hull to a 90 degree hole for a mushroom thru hull. The top picture is after drilling out the flush thru hull to the larger diameter. You can see the yellow-green epoxy in the picture with the black Airmar fitting. If you look closely you can see the yellowish epoxy (West G-Flex) darken to a more green color near the outer edge where it is filling the thinner edge of the bevel. It is bonded solidly to the hull. The outer edge of the Airmar mushroom does extend a little past the epoxy fill area so the epoxy fill is non-structural.
 

Attachments

  • IMG_1781.jpg
    IMG_1781.jpg
    76.1 KB · Views: 21
  • IMG_1807.jpg
    IMG_1807.jpg
    83.2 KB · Views: 49
  • IMG_1821.jpg
    IMG_1821.jpg
    45 KB · Views: 20
Last edited:

ChrisS

Member III
Thanks

Thanks to all for the replies. Mark thanks for the photos. Very helpful to see that.

I'll know more when I haul, and will try to update.

One thing I am finding is that the local chandleries don't seem all that well stocked. I did order some fittings from WM, and hope that I'll be covered in that department. Nothing like the yard clock ticking and driving around looking for parts.
 
Last edited:

toddster

Curator of Broken Parts
Blogs Author
Well, that was the reason that I punted on the sea-cocks last time. Every little part was two weeks away by UPS, may or may not fit, and I was out of time and boat-bucks.
 

nquigley

Sustaining Member
Adding on to an old thread (couldn't find a more recent relevant one).
I'm planning to replace all through-hulls (skin fittings) and seacocks next month.
Does anyone know the diameter of the holes for the through-hulls that serve the seacocks?
 
Top