Cabin Sole Project, Ericson 381 (40-minute Video)

Christian Williams

E381 - Los Angeles
Senior Moderator
Blogs Author

Full report on replacing the sole of the Ericson 381. Forty work days and about 120 hours of labor. Materials cost: about $1200 in teak and holly ply, $500 in varnish and the usual extras.

This 1984 boat, and other models of the early '80s, has a very complicated cabin floor. Even with factory templates and a full shop, it must have taken the carpenters an absurd number of hours to install and finish.

Ericson shortly after redesigned the mold to accept sole plywood without the need for edge trim, a substantial improvement in construction efficiency. I'd say the sole of the E32-3, for example, is twice as easy to fit as the models with trim.

The 381 sole was a work of remarkable craft in the context of production boatbuilding, and I did my best to reproduce it. I came close, or at least the new sole looks pretty much like the old one.

Note that my earlier plan to use glue was abandoned. The new sole is screwed down and plugged underfoot, like the original. The edges are screwed flush into the TAFG and covered with trim using countersunk bronze screws (the original trim screws were also plugged).

It is possible to remove this sole, if the #10 stainless screws can be freed from the TAFG. I used screw lube, but over time screws in fiberglass seize up. At least the trim now will come off easily, since not plugged.

Nobody in his right mind will ever do it. Or at least I never will.

Indexed as a blog entry
here.
 
Last edited:

K2MSmith

Sustaining Member
Beautiful work - well done ! I think it was well worth the effort because every time you board your boat the first thing you see is the beautiful finish on your floor !.. I think my cabin sole wood is still good but definitely in need of refinishing, so I think I am going to varnish it in place. A side question - what kind of paint did you use to paint your bilge ?
 

Christian Williams

E381 - Los Angeles
Senior Moderator
Blogs Author
Brightside, because I had some old stuff on the shelf. I've been using it for years, but I think any high gloss enamel would work.

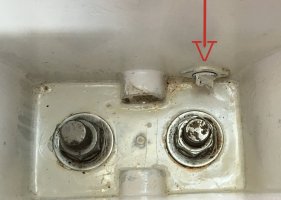
Keel bolts and washers taped off, because stainless needs oxygen.
 

bsangs

E35-3 - New Jersey
Excuse my French, but goddamn Christian, that is impressive stuff. Far beyond anything I'd ever tackle, much to my father's chagrin. It looks fantastic. Thanks for the video. Go get those parrots.
 

bsangs

E35-3 - New Jersey
Excuse my French, but goddamn Christian, that is impressive stuff. Far beyond anything I'd ever tackle, much to my father's chagrin. It looks fantastic. Thanks for the video. Go get those parrots.
Though I did feel cheated by your promise at the end of 40 minutes worth of sailing footage - and only getting 40 seconds. :)
 

dhill

Member III
Wow Christian - the new sole looks fantastic - as good as new! Who is the manufacturer of the teak and holly plywood?

Thanks for taking us through the process and Happy New Year!
Dave
 

Christian Williams

E381 - Los Angeles
Senior Moderator
Blogs Author
Don't know who made it. Comes from Asia, I imagine. Bought it from Frost Hardwood in San Diego.

The origin of lumber these days is apparently not always clear, as there are import regs and environmental (harvest) rules, and I am told much tomfoolery as to labeling. Good idea to look at it. My stuff appears good quality, or at least a perfect veneer both sides and no visible voids on the edges.
 

dhill

Member III
Thanks Christian, for the info on what to look for when choosing candidate plywood. How thick is the veneer?

Thanks!
Dave
 
Last edited:

Christian Williams

E381 - Los Angeles
Senior Moderator
Blogs Author
One mil (mm) is apparently the current standard. The old stuff was a bit thicker, I guess manufacturing has improved. Just don't try to sand it.
 

southofvictor

Member III
Blogs Author
Finally had a chance to watch your video last night Christian. Really impressive work. Your video does a great job of showing how much effort it took to do the job right while still making it seem attainable for a normal human. Documenting the tear out in your video was also a big help for me envisioning how the sole is put together and what it looks like underneath. Thanks for sharing!

We have some movement in our sole between the companionway ladder and the galley cabinetry. Feels more like flexing than sponginess. My thought is to just add a screw or two in order to suck the sole down to the TAFG. Do you think popping the panel in question off first would be worth it to see what the backside looks like? Or would it be overkill as a first shot at a remedy?
 

Christian Williams

E381 - Los Angeles
Senior Moderator
Blogs Author
Do you have the same construction?

If so, I wouldn't pull it up, because that will likely destroy the panels if the screws won't come out of the TAFG. You might remove a few plugs and try. Trouble is, if you wreck one segment it means replacing them all, unless you can live with the mismatch of new/old.

More screws would certainly be my first step. However, note that the TAFG has voids, meaning nothing to screw into. Here's the E381, but the -200 must be somewhat similar.
 

southofvictor

Member III
Blogs Author
Do you have the same construction?

If so, I wouldn't pull it up, because that will likely destroy the panels if the screws won't come out of the TAFG. You might remove a few plugs and try. Trouble is, if you wreck one segment it means replacing them all, unless you can live with the mismatch of new/old.

More screws would certainly be my first step. However, note that the TAFG has voids, meaning nothing to screw into. Here's the E381, but the -200 must be somewhat similar.
Thanks Christian. Has anyone used a stud finder succesfully to locate the TAFG? Or is the density differential not enough?
 

Christian Williams

E381 - Los Angeles
Senior Moderator
Blogs Author
Regarding cleaning paint and varnish brushes:

I have typically used tomato cans for mixing paint and such, but they're not a good choice when thinner is involved.

A viewer commented, "Watching your latest video on YouTube. I have a cannery and yes tomato cans have a liner. You need a peach or pear can because they are unlined."

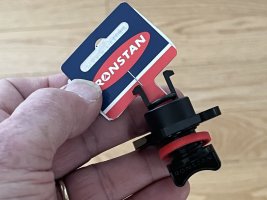
Cleaning brushes with acetone and using the cans for varnish transfer dissolved the liner and glopped up the job. So I ordered these mixing cups for future use. They can handle acetone for short periods, but not rated for storage.

(Why acetone? California restricts many petro solvents such as "mineral spirits", substituting acetone. It is judged not as bad on the environment as traditional products, I think mostly because of disposal issues)
 
Top