Replacing teak and holly floors 38-200

Tsicora

Member I
I have already read the tread on teak and holly floor replacement… A few simple questions that have not been answered,

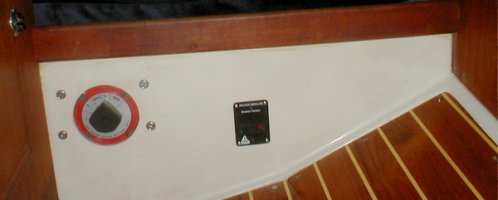
On the E 38-200 it appears that the plywood goes under the aft door way trim. If that is the case is it possible to redo the floor without removing the doors/trim? It looks like a bear to get the trim fitted back into the vinyl head liner once it is removed.

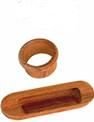
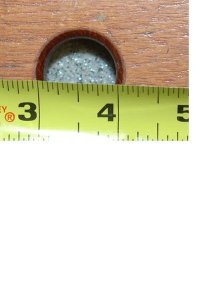
The other tread stated: “ used #6 square drive bronze screws which tarnish and tend to blend in” it does not mention anything about attaching the trim that goes around the perimeter. The trim has teak plugs, and when reusing the trim it is not possible to use surface mounted screws. Two questions related to this: Any advice on the easiest way to install the new plugs i.e. sanding down to fit. Were the trim pieces originally varnished to match the floor? I would like to prefinish everything prior to installation; hence, how to install plugs not to damage the prefinished work.

I’m open to any other tips on the 38-200 floor replacement that may be different from the other tread.

Thanks…
 

Trucker Doug

Member II
OK I'M really PISSED. 2 times logged in and it dumps my reply.
I can tell you as I just did this job E mail me at dougb123@verizon .net
 

treilley

Sustaining Partner
I replaced the sole in my 35-3 last year. I removed all the trim and brought in to the house to strip. I then replaced all the sole. I had to remove the door trim to the head but it was not that difficult to get back into place. I applied a few coats of finish to the sole for protection. After reinstalling the sole and trim, I replaced all the bungs and used a Fein multimaster to trim off the bungs, sanded them fair and applied 5 coats of finish to the sole and trim.
 

Tsicora

Member I
Doug, I emailed you directly. So you can try it that way. I can always post it for you if it comes through.

Tim, Thanks for the encouragement about replacing the doors. Did you use bungs throughout the floor also?

Any thoughts on if the trim was originally varnished. It looks that way…
 

Tsicora

Member I
Doug, Just a thought... write the reply in a word document first so you don't loose it. Thanks for your persistence!
 

Trucker Doug

Member II
I just sent you this in a e mail but I'll post it anyway. Don't know what was going on last night but everytime I had more than 1 line it deleted it, frustrating!
Anyway, just finished my 38-200. Remove all the door jams and life will be alot easier and you'll end up with a better job. In the V you only need 1 piece the original was joined for no apparent reason. I opened up the bilge to mid stringer on both sides and am happy I did as I can now clean it properly. The next piece goes all the way to the back. The only changes I made were to simple it up by cutting the nav station bulkhead at a slight angle to remove the toestumper did the same to the bulkhead at the seatback/engine bulkhead. They hang in midair so it's not a support issue and it'll make you able to make more straight cuts and the finished product is cleaner looking without all the litte mouldings.
I rearranged the gally area by putting in 1 piece behind the engine mid stringer to stringer and used only 1 piece for the gally and the quarterberth. That way if I need to get to the exhaust hose/hot water heater hoses/wireing, I only need to remove 1 piece.
In the quarter they have some angled nonsence tapering up. I did away with the seam at the door jam and carried 1 piece for the gally/quarterberth by taking a belt sander to the bottom of the plywood where the subfloor begins to curve up. The subfloor on mine by the locker was nice gelcoat so I just trimmed it out and didn't cover the sharply curved area.
It's alot more work than I thought going in but the reward is worth it. Get a countersink drill bit for screwing the floor down and a bunch of bungs and a new sharp chisel to trim them. It gets tedious but by the time you're done it looks like a new boat. Do it proper with the bungs and you'll be happier with the end product, leave brass screws for cheap boats.
PS: When picking out the teak and holly plywood try to find pieces that match. I didn't know they are not all the same and one of my pieces is lighter in color than the other 2 and didn't notice till I was fitting it in. Took me 3 sheets in all. Good Luck!
 
Last edited:

Trucker Doug

Member II
1 more thing. In your original question about the ceiling. it's not an issue. Once the screws are out of the jam and the moulding on the floor is off the bottom kicks out and it slides right out.
 

Tsicora

Member I
Pulled the floor out in about five hours. It came out fairly easy.. It was glued down. Now the fun starts figuring out what needs to be replaced under the floor. found why the floor was discolored the drain for the shower was leaking.
 

treilley

Sustaining Partner
My experience with the door trim was similar to Doug's. I did use bungs in the sole. I have no idea what the original finsh was as the previous owners had really messed it up.
 

Tsicora

Member I
Little round rings

Where can some one find the little round wooden rings that are used to pull up parts of the floor?
 

Loren Beach

O34 - Portland, OR
Senior Moderator
Blogs Author
When I added some new "finger rings" to finish out the holes in the new access panel I created in our teak and holly sole, I bought some of these rings at the local chandlery. As I recall, they have a ridge on one side that needed to be sanded off after the ring was glued into the hole.
I found a picture at this web site with a quick search:
http://www.duncanyacht.co.uk/showpartnumber.asp?CategoryID=20689&PartNumberID=157300

Of the two types pictured, it is the... round one...
:)

Loren
 

Attachments

  • {C82EB0C5-0961-4152-A752-F147EB1277D7}_teak.jpg
    {C82EB0C5-0961-4152-A752-F147EB1277D7}_teak.jpg
    2.4 KB · Views: 363

u079721

Contributing Partner
Make it removable?

Fortunately I never did have to tackle the amazing job of replacing the cabin sole in our 38. But in reading about how much trouble it is to get the old sole up, and with other threads about needing access through the sole, I was wondering if it wouldn't make sense to design the new floor so that it was readily removable for maintenance and cleaning.

Has anybody tried that? I suppose the problem is that the screws you would need couldn't then be covered by bungs, and might look like hell and collect dirt. But it sure seems like a desirable thing to be able to get the floor up without destroying it.
 

Tom Metzger

Sustaining Partner
Offense taken

...and might look like hell...

Steve - I take offense. In the 9 years since I put in a new cabin sole with stainless screws showing I have had no one refuse a drink on my boat protesting the appearance of the cabin sole. :cheers:

In fact, I would say that they are some of the least objectionable screws on the boat. And based on Murphy's corollary saying problems occur where least accessible I have saved a lot of grief.
 

Attachments

  • Windlass 006A.jpg
    Windlass 006A.jpg
    112.4 KB · Views: 223

u079721

Contributing Partner
I love it! Absolutely functional. BUT, no teak bungs covering over the screws? Not very nautical of you. ;)

Personally I hate those bungs. When ever I would have to remove a piece of trim to work on some project my wife would always get after me to put the damn bungs back in. But I always figured I would just have to remove that piece of trim again, so why bother?
 
Top