brianb00
O - 34
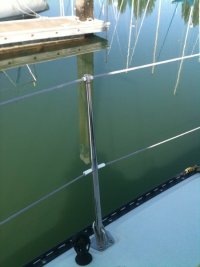
As I mentioned in some other places, we ended up with a suddenly cracking and rusting vinyl covered lifeline about two weeks ago. That created a more urgent replacement need than we'd expected so we decided to just have it done while we work on the other installations we already have under way.
We took Jeff Asbury's recommendation and called Seatek here in San Pedro. 4 or 5 workdays later we have the new swaged, bare SS lifelines installed and they look great ! The cash price was $560 installed, would have been a bit more if we'd used a credit card.
I think just the parts would have cost us more if we'd done it ourselves.
-Sven
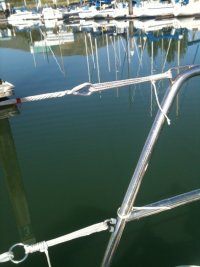
Interesting. I just switched over to Dynema life lines after a fellow racer, on a start line, decided his boom would tuck nicely under my starboard lifeline. Apparently the swedge fittings were a bit weaker than the hull connections so the lifeline snapped. After inspection I too found the swedge fittings getting pretty rusty, so opted to replace all.
Regards,
Brian
Olson 34