Coaming boards
Dave,
I just completed my new boards last August on my 1972 E-35. The old boards were shot (cracked, thin from excusive sanding/acid washing, cupped, etc.). I took the old ones off and used them for templates on the new teak planks. I special ordered the planks @ 12' long x 14" wide x 13/16" thick (600.00 total three years ago). I used the old boards as templates and added about a 1/2 in height and a wider openings to the cubby holds.
Part of the problem was that the plywood in the cubby holds was rotten in a several places (be sure to check this when the boards are off). The rotten ply took some epoxy work (lots of injections) and two part primer and paint to fix. It all looks great now with the new boards. Also, my coamings did not have drains, so the water sat in their until it evaporated or I bailed it out. I have subsequently drilled drain holes in th efiberglas coaming boxes.
As for difficulties? there are a few:
1. The bungs were epoxied in place and did not always come out easy. If you are to reuse the boards, be VERY careful here.
2. Siezed nuts and bolts. There were about 6 - 8 bolts and about 5 or 6 self tapping screws per side. (I used a disc grinder on several to chop them off)
3. Cracking the dried out teak when removing (one plank was already cracked and also had prior repair).
4. No issue with the caulk as it was so dried out anyway.
As for refinishing, I used a three step process on the new planks:
1. Penetrating epoxy (such as Smith & Co which is very thin)
2. Numerous coats of Cetol lite (maybe 8 coats - it's easy when inside)
3. Three coats of Cetol Gloss (also when inside)
After installing, coat the sanded bungs with epoxy, coat with Cetol Lite, then coat the entire coamings with gloss. Renew Gloss once a year.
Godd luck,
John Moses
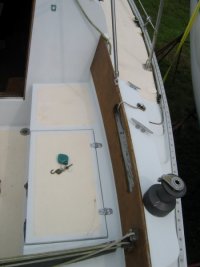 SideBoard.jpg167.7 KB · Views: 114
