Recorring the Deck on a 36C

Wander

Member II
I am about to start the recorring process on my 36C. I will try to lay out what I've done so far, and hope to solicit advise and comments from others that may have been down this road before. Any thoughts or constructive opinions are heartedly welcomed.

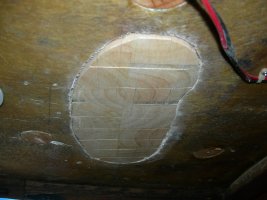
The first thing I did was remove the headliner from belowdecks. This gave me access to the bottom skin of the cabin top. I drilled several 'test cores' using a 2" hole saw and found sections that were very dry and sections that were very wet. I decided I needed a more scientific approach, so I drew a grid on a piece of paper and then took regular readings with a moisture meeter, recording the reading every 12". I then put the information into a spreadsheet and color coded each grid square, with blue being dry and red being wet, with gradients in between. This produced a great map of the wet areas on the cabin top.

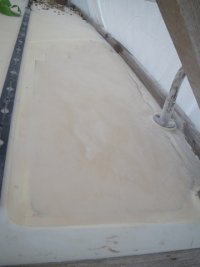
I have also removed almost everything from the deck top, including jib tracks, blocks, and the dorade boxes. I think I'm pretty close to ready for the actual cutting of the fiberglass, and here is where advice is needed.

I have read that I should have at least 3" of fiberglass on each side of a cut to effectively feather in the patch after the new core is in place. My plan would then be to draw a line 3" away from the toe rail, hatches, and other borders and make my cut there. Does this make sense? Am I missing anything important?

More to come.
Joe
 

MarkA

Please Contact Admin.
Any thoughts or constructive opinions are heartedly welcomed.

More to come.
Joe

I have nothing useful to offer, except to thank you for sharing this. I may need to do this one day, and the thought of it scares the crap outta me.

I almost wish I lived in a climate that forced the boat out of the water for a few months a year so we could tackle such projects.
 

Wander

Member II
A comment from Matt on another thread stated that it "wasn't that hard" or something to that effect. I hope to prove him right on this!
Joe
 

Frank Langer

1984 Ericson 30+, Nanaimo, BC
A guy in our marina recently did a recoring of his bow on his older boat (not an Ericson). He set his circular saw to cut to a certain depth (about 1/2") and cut the whole area above his V-berth. The core in this area was saturated and came up quite easily. He cleaned it up, put in new wood core, replaced the top fibreglass skin, did some fibreglass work to smooth it all out and then painted it. Next day you couldn't tell it had been touched!

Good luck!

Frank
 

Wander

Member II
Thanks for the encouraging words. I keep hoping it goes that straight forward. Do you know how far your neighbor came away from the edges before making his cut?
 

Frank Langer

1984 Ericson 30+, Nanaimo, BC
It looked like about 3 inches from the toe rail edge of the boat, but I didn't have a tape or any reason to measure it at the time. I would be guided by 1) is there any natural break point in the gelcoat where your cut might be less visible; 2) be far enough from the edge so you can get your saw into position comfortably and work carefully; 3) is there an area where your eventual repair might be easier to conceal by painting that area, etc. 4) ensure that you cut close enough to the wet areas to be able to get them all out, clean it up and add new coring. Make sure you adjust the depth of your cut to get through the top layer of fibreglass and the coring, without cutting into the bottom layer of fibreglass (the cabin ceiling).

Good luck! Remember that almost everything on a boat can be fixed with enough time and/or money. :)

Let us know how it goes, and ask more questions as necessary.

Frank
 

bigd14

Contributing Partner
Blogs Author
Check out WWW.plasticclassicforum.com for several examples of recores. Mine is documented under projects as Ericson 27 project. Also check lackeysailing.com for lots of well documented projects. Do alot of reasearch! It can be done bit there are quite a few tricks to it. Also from what you describe I suspect your deck will not come off cleanly if you go in from the top. Messy job if you go from the bottom... good luck and keep us posted!
 

bigd14

Contributing Partner
Blogs Author
In response to your question about how much area to leave for feathering I think I remember the standard being 12:1 so depending on how thick the deck is you might get away with <3 inches. At any rate make sure you will be able to remove the damaged core material. On my e27 core extended up to the toe rail which was furthear tham i thought. Cabin top should be more obvious where your core ends . Alsomake sure you can squeeze thickened epoxy into all areas where core was removed.
 

Greg Ross

Not the newest member
Tackling from above or below

Sounded like you've been doing all your test cuts and moisture sampling from the under side. I made the assumption that you were approaching the repair from beneath as well. Maybe not the best one to be proffeing advice since I've done neither but, If I knew I had substantial deck issues, I'd go at it from the interior. I have had the mess in the boat, engine bed was reconfigured for a next larger engine involving cutting, glassing and much grinding, filling the boat from stem to stern with FG/ and dust. After vaccuuming throughout I basically hosed it down and pumped the bilge.
I believe the advantage to working from the underside would be that you wouldn't have to attempt to lift acres of glass at a time, nor the restoration to try and make the topsides look original. From below, once you zero in on wetness you cut until you find dry core in four directions, and the shape of the excavation doesn't matter. At a minimum get geared up with grinding and cutting tools that can use a vaccuum collection attachment and use the wet/ dry Vac. to at least reduce the mess.
Since this is major demolition the interior can be suitably masked/ covered and protected from drips and drops.
That's me
 

Emerald

Moderator
I've done a variety of core repairs and other fiberglass work. I always go from the underside if accessible/possible. I think it is much easier to get a sound lasting repair with the best visual outcome. From below, I feel you have better control on the conditions and are not forced into completing work. It's easier to deal with edges - you can glass back overlapping onto the surrounding area without worrying about having to bevel edges and do a butt repair. While a 12:1 ratio is considered to provide a strong joint, I feel it's just inherently stronger and easier to overlap. Of note, you don't just stack 5 layers of exact size pieces of glass - you cut them progressively larger to feather out into the surrounding areas so that in overlapping you don't build up a ridge. Finally, I think it takes much more finishing work to mold and duplicate non-skid and reproduce other patterns topsides, and have it all look like it was never touched. I do understand the appeal of not working upside down, and not having to quasi gut the interior, but I've had good luck working as Greg describes with "dustless" tools and also making good use of heavy plastic well taped in place to isolate work areas.
 

Wander

Member II
Wow, just when I think I've got a good plan in place in my mind, along comes other good advice. I have indeed made my test cores from below, and I've made a detailed map of the deck using a moisture meeter to know where the truly wet spots are. But I was planning to start the real cutting from the top, just because in that position gravity is my friend. My problem with working from below is the bulkheads and other pieces that will be hard to work around. Since I plan to completely replace the built-in non-skid I don't have to worry about that kind of detailed matching of textures.

I will take some time to look over the links above and then come back with some other questions. Additional thought are appreciated.

Thanks All.
Joe
 

Emerald

Moderator
As you're checking into alternatives, look at working with gelcoat for topside approaches. I think I would head in that direction instead of painting, if I did work from above.

Have fun! :devil:
 

Wander

Member II
David,
I did see an article on putting new gelcoat on the deck, althought that write up was more about trying to match the existing molded non-skid. I'm going to spend this weekend thinking about the pros and cons of both approaches and hope to make a decision so I can start cutting next weekend.

Cheers,
Joe
 

gadangit

Member III
Recore from below process?

I'm trying to visualize this recore project from below. I too have this on my list to do someday... Are there any pictures of work from below? Also, is the thickened epoxy that you squish the balsa core pieces into "sticky" enough to stop the whole layer from sagging down while it is curing? Would there be benefit in using a marine plywood that is cut to the size of the area, I can see that being braced from below...

Thanks-
Chris
 

Keiffer

Member II
Re-Core overhead Ericson Independence 31 from below

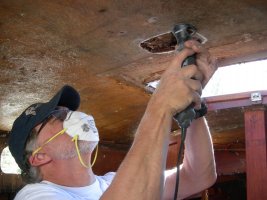
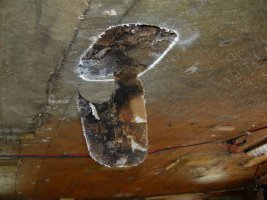
I had several areas of moist or dry rotted wood in the overhead. I removed the headliner and all deck hardware. I used a dremel tool to remove the bad areas until I reached solid wood. I also re-cored all thru bolts for handrails, travler, etc.

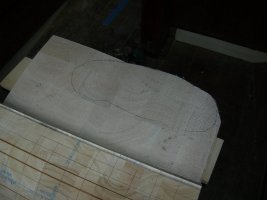
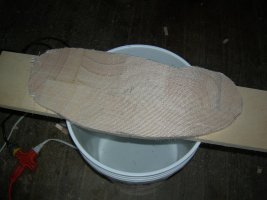
I elected to use balsa and West System Epoxy.

DSCN7323.jpgDSCN7322.jpgDSCN7397.jpgDSCN7398.jpgDSCN7399.jpg
 

Loren Beach

O34 - Portland, OR
Senior Moderator
Blogs Author
Mr. Google might know where a re-coring thread is...

Several years ago I recall seeing a story and pictures (this site or another...) of an E-35-2 with some extensive recoring done under the whole fore deck. From the photos it looked like a small "forest" of 1X2's was holding up plywood plates on top of which might have been some soft foam and on top of all that was a layer of plastic sheet. This was pressed upwards with force against the new balsa core and thickened epoxy.

I have actually done something very similar under my side decks when installing some G10 plates under stanchion bases. I did not have any core issues, but was holding the backing plate up until the epoxy kicked.
When I was holding up the plates I was using a pair of 1X2 pieces and a C clamp to make an "adjustable" prop. It took a bunch of props and clamps...

Working on my back or twisted onto my side while laying on the galley counter was no fun at all.
(That's the kind of effort better suited to being under 40 rather than over 60 !)
:)

Loren
 

mattwierzba

Junior Member
My deck repair

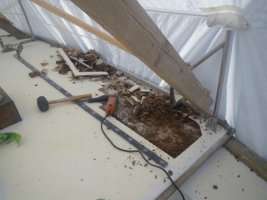
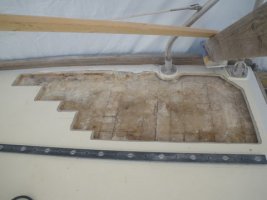
Here are some photos of one of the sections of deck repair that I did. When I said it was pretty easy, I didn't mean that it wasn't a labor intensive and time consuming process. Step by step, it all worked out though. I did go from above, because I was going to renew/replace lots of nonskid after removing the teak on my boat.

IMGP4499.JPG

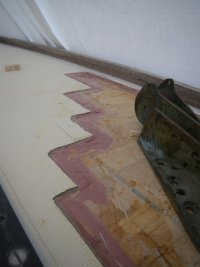
After I removed the top layer of glass and took out all of the wet core, I beveled the edges of the repair. I didn't go back 3 inches- more like one inch. As I placed successive layer of glass over the repair, they each went to the edge of the bevel and eventually I was at deck level. I read about his technique in Don Casey's book This Old Boat.

IMGP4515.JPG

The odd shape of the repair has a lot to do with the good core that was left. I just kept cutting until I found dry core. I didn't cut all the way to the rail, but was able to scrape out the old core in that section and fill it with epoxy/colloidal silica. The great thing I found out about this boat, it all of the factory installed hardware is in solid glass, so I didn't have to remove the jib track or stanchion base. I just filled in around those areas.

IMGP4533.JPG

I probably added 4 layers of fiberglass cloth to get the repair back up to deck level. All in all, there were a lot of steps- glass, grind, fill, sand, glass, grind . . . but I am happy with the final product.

IMGP4851.JPG

I used the same process around all of my chainplates and with the re-coring of my cockpit sole- a much bigger and longer process.

Again, I am painting my entire deck and replacing the nonskid with Kiwi grip, so going from above was my choice. . . and gravity was definitely on my side.

Hope this is helpful.

Matt
 

Loren Beach

O34 - Portland, OR
Senior Moderator
Blogs Author
Nice work Matt!

I think that you are on to something... Much nicer to have gravity working for you.
And then, after a quarter century or so, lots of (most?) boats - all makes - are ready for new nonskid anyway. Quite a few boats built in the 60's and 70's in our club have had new LPU (sand nonskid) deck refinishing done in the last decade.

If we keep our boat on into our old age, we will need to remove all the deck hardware and apply new nonskid throughout. That's also the time to make any hardware location changes that have accrued on the to-do list...

Cheers,
Loren
 
Top