I ran some wires a few years ago between the nav station and my water tanks to install tank monitors. Most of the run was relatively simple, but the section behind the shower required pulling the shower mixing valve. It sits in a 4-5" hole that's covered up by the valve trim kit and, as far as I can see, is the only way to access about 2-3' of wiring. Of course, Ericson put 3 wire clips and a few wire ties in this 2-3' and there's a small bulkhead that separates the shower from the main head in this area. I've since snaked a wire through this area, but it's very difficult to line up the passages in the three bulkheads between the shower/v birth and the head cabinet. It's also impossible to remove the old wiring which isn't necessary, but absolutely drives me nuts. When I put everything back together the first time, I wasn't able to get the old valve to stop leaking and I couldn't find a replacement. We've just dealt with the small leak for the past few years because I knew this wasn't going to be a fun job, but my wife and crew finally got tired of me turning off the pressure water to stop the leak.
Valve removed and project started:
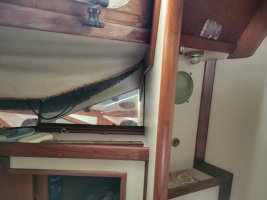
Since the valve opening was the only access to the wiring and I didn't want to remove the valve after I installed it, I took the opportunity to replace the old wiring, install a few new DC circuits, and install a section of conduit to make future wiring projects easier (insert can of worms here). It took 4 trips to the marine store, three trips to the hardware store, and 3 days... oh and I haven't even started terminating the new wire yet, but the new mixing valve and trim kit is in.
starting to pull new wire behind the valve:
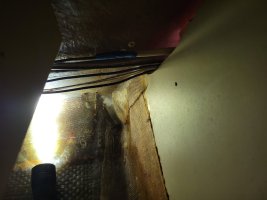
Bulkhead passages:
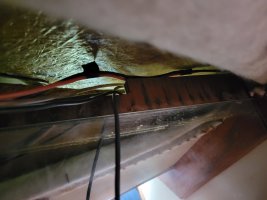
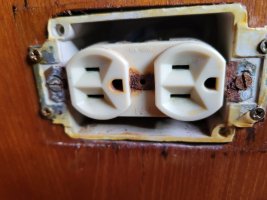
I replaced the cabin light and bow navigation wires back to the nav desk, extended the USB outlet circuit to the v birth, and added a circuit for a cellular/wifi router I'm installing near where the old stereo was. I also replaced the AC outlet wire which led to the discovery of my outlets were badly corroded and needed to be replaced. This involved removing every wire clip securing the run to the cabin top and replacing with zip tie anchors. Zip tie anchors are great because you can cut the zip tie, loosely install a new one, and run new wire by threading it through the loose ties. Once the wire is in and terminated on one end, you can tighten the new zip tie and terminate the other end. No more threading wires through 30+ year old wire clips!
old hidden clips (this one had tabbing over the screw which indicates the wiring was installed on the deck before it was flipped right-side-up and installed on the boat)
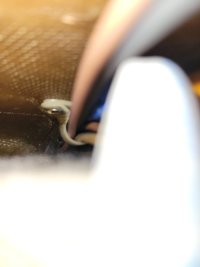
Old AC outlet
After pulling the new wire and conduit, I focused on installing the new mixing valve. I chose a Delta Mulitchoice valve body because the valves are readily available and inexpensive. The valve body comes with many connection options. Since I recently plumbed with PEX, I chose the option with PEX lines in and ½” NPT lines out. I did not consider how difficult it would be to install a rough in valve in a boat or verify what kind of PEX connection was machined into the body. It turned out the body was designed for the expandable PEX not the crimp connectors. I ended up buying a new valve with all ½ npt connectors and using crimp PEX adapters.
The rough in valve is not designed to be retrofit behind a wall. The are typically attached to 2x4 bracing between studs before the wall is drywalled. I had to build a support from plywood that screwed into the wall from the front and provided a surface to attach the valve. Since the valve was already connected to the plumbing, this took some careful manipulation to get the bracket through the hole, behind the valve, and secured to the back of the plywood.
Plywood bracket in the lower left hand corner before install:
In retrospect, and I only came to this conclusion as I was typing this up, I think it would be much better to cut a larger opening, cover with a new panel, and install a simple two valve shower mixing assembly that’s attached to the removable panel (something like this: https://www.amazon.com/HowPlumb-Mob...ocphy=9033382&hvtargid=pla-570803791381&psc=1).
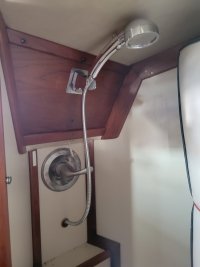
Completed install:
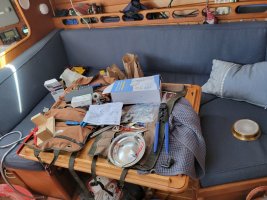
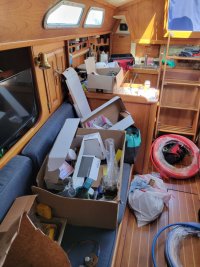
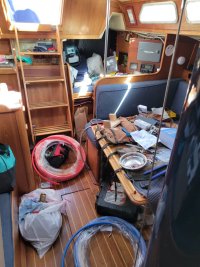
Disaster this project has left behind
Valve removed and project started:

Since the valve opening was the only access to the wiring and I didn't want to remove the valve after I installed it, I took the opportunity to replace the old wiring, install a few new DC circuits, and install a section of conduit to make future wiring projects easier (insert can of worms here). It took 4 trips to the marine store, three trips to the hardware store, and 3 days... oh and I haven't even started terminating the new wire yet, but the new mixing valve and trim kit is in.
starting to pull new wire behind the valve:

Bulkhead passages:

I replaced the cabin light and bow navigation wires back to the nav desk, extended the USB outlet circuit to the v birth, and added a circuit for a cellular/wifi router I'm installing near where the old stereo was. I also replaced the AC outlet wire which led to the discovery of my outlets were badly corroded and needed to be replaced. This involved removing every wire clip securing the run to the cabin top and replacing with zip tie anchors. Zip tie anchors are great because you can cut the zip tie, loosely install a new one, and run new wire by threading it through the loose ties. Once the wire is in and terminated on one end, you can tighten the new zip tie and terminate the other end. No more threading wires through 30+ year old wire clips!
old hidden clips (this one had tabbing over the screw which indicates the wiring was installed on the deck before it was flipped right-side-up and installed on the boat)

Old AC outlet

After pulling the new wire and conduit, I focused on installing the new mixing valve. I chose a Delta Mulitchoice valve body because the valves are readily available and inexpensive. The valve body comes with many connection options. Since I recently plumbed with PEX, I chose the option with PEX lines in and ½” NPT lines out. I did not consider how difficult it would be to install a rough in valve in a boat or verify what kind of PEX connection was machined into the body. It turned out the body was designed for the expandable PEX not the crimp connectors. I ended up buying a new valve with all ½ npt connectors and using crimp PEX adapters.
The rough in valve is not designed to be retrofit behind a wall. The are typically attached to 2x4 bracing between studs before the wall is drywalled. I had to build a support from plywood that screwed into the wall from the front and provided a surface to attach the valve. Since the valve was already connected to the plumbing, this took some careful manipulation to get the bracket through the hole, behind the valve, and secured to the back of the plywood.
Plywood bracket in the lower left hand corner before install:

In retrospect, and I only came to this conclusion as I was typing this up, I think it would be much better to cut a larger opening, cover with a new panel, and install a simple two valve shower mixing assembly that’s attached to the removable panel (something like this: https://www.amazon.com/HowPlumb-Mob...ocphy=9033382&hvtargid=pla-570803791381&psc=1).
Completed install:

Disaster this project has left behind


