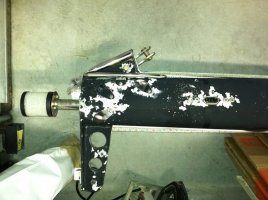
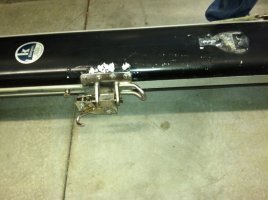
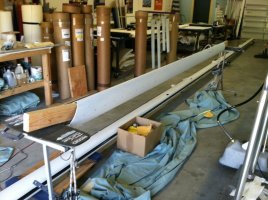
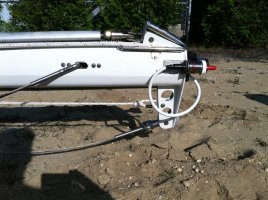
I have unstepped the mast on my E38 to refinish over the winter. I have read several threads from people who have refinished masts. Many seem to strip to bare metal but a couple simply sanded then primed. The paint on my mast is mostly in place with no obvious corrosion (I have already stripped hardware on the boom and it is quite clean), but there are several spots where the halyards have rubbed through. What are thoughts on simply sanding smooth then prime the bare metal and put on a 2 part?
You are using an out of date browser. It may not display this or other websites correctly.
You should upgrade or use an alternative browser.
You should upgrade or use an alternative browser.
Mast refinish-Strip or sand?
- Thread starter lnill
- Start date
mast strip/sand
Hi, This spring I sanded my boom and mast from my 35mk3 with an orbital sander and 100 grit paper. 10 hrs later I had bare aluminum. Interlux reps had me use Interprotect 2000 for a primer (no more zinc coating) and finish with their 2 part Perfection paint. I rolled and tipped and heard nothing but Ooh"s and Aah's from all who saw the finished product. Reinstalling the fittings with SS 3/16" rivets was easy and I ended having a welder secure a nut to the inside of all the stay and shroud mast fittings to make that job simple and strong, otherwise you'll need a pnuematic rivet gun to set 1/4'' rivets. My mast was black from the factory but looks a hell of a lot better in white. Hope this helps.
Carl
Carl,
Thanks.
I sanded the boom today and it really seems to be solid. I hit it with 60 grit to "break through" and then with 150 to smooth. There is paint remaining on about 50% but well feathered. I think otherwise I am going to follow your lead. Interesting point about the welding. Did you move the mast from the boat yard or have a welder come to the yard? I was assuming I would either have to buy the rivet gun or have the yard do that for me ($$$). My mast is 55 feet and I don't have a vehicle to transport something that long.
Lee
mast paint
Hi Lee,
I drilled out the rivets holding the shroud plates to the inside of the mast, actually I used a right angle grinder also, then punched the rivet into the mast. I thought about purchasing a rivet gun from Harbor Freight for about $65 but decided to have 1/4-20 nuts welded to the inside of the plate. All the other rivets are 3/16'' and I used a Ace hardware rivet tool to set these. Ouch! my hand hurt after setting all those line/wire


 exit plates. The inside of mast shroud plates installed simply with loc-tite to hold bolt. I donated a couple hunderd bucks to the local high school crew team to tranport my mast about 30 minutes each way from boatyard to my shop. Their boats are up to 65' long. My mast was 51.5' long and just fit inside my canvas shop. I spoke with Awl grip and Interlux reps and felt the interlux 2 part paint was an acceptable paint for the diy guy. Having the mast indoors helped but I'm sure a great job could be achieved in your local yard. I look at this project as one that I will never do again (at least on this boat). The end result looked like new. Interlux will take the time to answer all your questions. I ended up with 1 coat of interprotect 2000 and 3 coats of the Perfection. 2 coats would have worked but I made the mistake of not lightly sanding after the 1st and I knew I could do better. This was also a great time to install new wiring,lights and wind instruments. I'll try to add some photos.
Carl
Hi Lee,
I drilled out the rivets holding the shroud plates to the inside of the mast, actually I used a right angle grinder also, then punched the rivet into the mast. I thought about purchasing a rivet gun from Harbor Freight for about $65 but decided to have 1/4-20 nuts welded to the inside of the plate. All the other rivets are 3/16'' and I used a Ace hardware rivet tool to set these. Ouch! my hand hurt after setting all those line/wire


 exit plates. The inside of mast shroud plates installed simply with loc-tite to hold bolt. I donated a couple hunderd bucks to the local high school crew team to tranport my mast about 30 minutes each way from boatyard to my shop. Their boats are up to 65' long. My mast was 51.5' long and just fit inside my canvas shop. I spoke with Awl grip and Interlux reps and felt the interlux 2 part paint was an acceptable paint for the diy guy. Having the mast indoors helped but I'm sure a great job could be achieved in your local yard. I look at this project as one that I will never do again (at least on this boat). The end result looked like new. Interlux will take the time to answer all your questions. I ended up with 1 coat of interprotect 2000 and 3 coats of the Perfection. 2 coats would have worked but I made the mistake of not lightly sanding after the 1st and I knew I could do better. This was also a great time to install new wiring,lights and wind instruments. I'll try to add some photos.
Carl
Carl,
thanks again. Your mast looks nice. I was able to simply drill the top off the rivets and punch them out. In my case I am 45 miles inland from the boat so would have to pay some trucking company to transport and my shop is not long enough for the mast anyway. I have asked the yard for a quote to paint only (I do all the prep). Depending on that quote I will either do it myself in the yard next spring or I will pay them to do the priming and painting (inside). I will have all the hardware stripped by next Tuesday (one last spurt of nice weather this weekend in New England). Looks like I will be buying the riveter.
Lee
update
well, I guess I was a bit overly optimistic about this. I started working with the boom and the paint was real solid. Should have realized that the boom has always been covered. The mast was quite another matter. Long story short, I used a chemical stripper and removed every spec of paint. Then sanded with an orbital and 150 grit. Good news is that I only had two screws in the entire assembly that I could not get out either by hand or with an impact driver. The whisker pole track was by far the worst and I had to drill out two of those screws and retap. Overall the job went pretty fast. Removing all hardware and marking and documenting, strip and sand mast and boom all took about 40 hours. Now ready for paint which is not going to happen until March or April. Will just hand sand right before primer. After looking at the rigging with a magnifier, all the standing and running rigging is going to be replaced. I have to replace two spreaders because the PO kept the wire halyards up against them and the steel won out over the aluminum. Will take the rigging to a place down in Falmouth MA (called Rigging Only) and get them to build the new stuff. Going to switch from wire to all rope.
Will post some pictures etc when closer to complete.
