Lexan?

celtic sea

Member III
Hi, was wondering what exactly is everyone using to rework those hatch tops. 1/4" or 3/8" Smoked lexan, standard poly?. I need to at some point replace the weathered clear that's on there now. The frames are in good shape and I like the wood look. Thanks.
John
E35-2
#413
 

celtic sea

Member III
Lexan

Just did a search and lots of info here, probably should have checked first. Lots of help here!
Any second thoughts though?
John
E35-2
#413
 

Loren Beach

O34 - Portland, OR
Senior Moderator
Blogs Author
"Plastics, my boy!"

Lexan(R) would be best choice for raw strength. The modern version of this polycarbonate can be found with a UV-resistant surface. Acrylic is more resistant to UV, and is commonly used for hatch lenses - it's less expensive too.

Either material is touchy to drill holes in - they have to be slightly oversize to allow for thermal expansion of the lens without fractures around the fasteners. We followed all these guidelines when replacing the fogged and scratched-looking fixed ports on our Olson, in 1995. They do not leak, but for clarity I have to polish them every few months nowadays.

For real longevity, DO put COVERS over them when you are not using the boat. The sun is the enemy of all plastics.

Loren
 

markvone

Sustaining Member
Cast Acrylic and Insulated Hatch Covers

Hi John,

This thread has info on polycarbonate (lexan) vs acrylic (plexiglass) and also on Select Plastics who's website has plenty of info on all aspects (sealers, gaskets, glue for gaskets) of hatch repair. They can also do the re-furb if you can't.

http://www.ericsonyachts.org/infoex...-quot-Acrylic-vs-1-2-quot-Polycarbonate/page2

Unless Lexan has gotten a lot more UV resistant, I think cast acrylic (not extruded) is generally recommended for hatches. Lexan is also more flexible which is a problem for sealing in the frame designed for stiffer acrylic and a surface that you load up by walking on.

I just did my two Atkins - Hoyle hatches last winter with cast acrylic. I had the lenses cut locally by my local shop, Maritime Plastics in Annapolis, and did the rest myself. A non-marine specific plastic shop will be cheaper for the acrylic. I also think you can cut you acrylic yourself if you desire. I'm planning on cutting my single piece acrylic companionway board myself.
The hardest part of the job, by far, was cleaning out the old sealant. Your wood framed hatches should be a much easier clean up. Not a hard job and well worth the results. I replaced my gaskets as well. All the materials are available online or from a plastics shop.

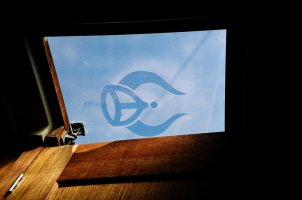
My local shop, Maritime Plastics in Annapolis, changed my mind from using clear for the overhead hatches. They said they had never made hatches in clear. I had black hatch covers so I thought clear would let more light in during the winter months and cloudy days. I didn't want something really odd for my hatches when I sell the boat (even if it might be a better idea) so I went for the typical tint level (#2412) in a bronze. It's similar in tint level to the #2064 tint in grey that I have for my ports. Now that it's winter, I don't regret getting tinted vs clear lenses. The tint lets in plenty of light. Also, I never notice that my hatches are bronze tint and my ports are grey.

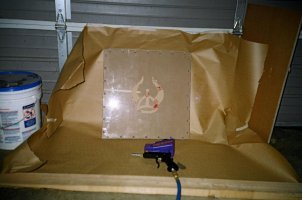
As for hatch covers. I switched to light tan covers from my old black ones. I also had a 1/2 inch closed cell foam pad added in a pocket under the top surface. My plastic guy says it's mostly thermal stresses that craze the lenses. The dark tinted acrylic heats up in the sun and then gets quickly cooled and micro cracks when it rains (or you hit it with the hose). He said the insulation was a great idea. In the tropics this is a bigger problem with more sun and more thunder showers, so they have gone from dark tinting to white frosted acrylic on horizontal surfaces like skylights and hatches where you want light but don't need to see through. The frosting acts like tinting but it absorbs much less heat and if it slowly starts crazing it's not visible. See posts #6 and #10 of this thread for experience with insulated hatch covers:

http://www.ericsonyachts.org/infoexchange/showthread.php?7120-Lewmar-replacement-acrylic-1988

Let me know if you have any questions.

Mark
 
Last edited:

woolamaloo

Member III
My >30 year old crazed blue Lewmar lenses are currently out of their frames and at a plastics shop being duplicated. The shop recommended Lexan for its strength but mentioned that acrylic was more scratch resistant. They wanted $190 for the two lenses in acrylic and $250 in Lexan. That doesn't compare too badly to the $80 that Christian paid for each of his two acrylic lenses in 2012. After leaving my old lenses with them, I got a call and they asked me to stop by. They had two 4x8 sheets of 1/2 inch thick smoked scratch resistant Lexan that were left over from a previous job. It was a lighter smoke than I was thinking of but it still looked great. They're making the lenses with that for $200 total. The old main hatch lens was 1/2 inch thick and the foredeck lens was 3/8 inch. Now, they'll both be 1/2 inch. But since the depth of the two frames are the same, I'm sure they'll be fine.

They said they'd have them done by "mid-month." My frames are cleaned up and taped and ready to set the lenses with Compass Marine butyl tape and Dow 795 just like Christian did.

I already have the materials to make the covers using Sailrite's video.
 

Christian Williams

E381 - Los Angeles
Senior Moderator
Blogs Author
I would not use butyl tape again for this purpose--nothing wrong, but it oozes.

If contemplating, it would not be a bad idea to run an eye over my second (more recent) experience with hatch lens replacement, at least for the links provided.

http://www.ericsonyachts.org/infoexchange/entry.php?377-Thelonious-II-Main-hatch-forming-Vetus-cowls

Also, if tempted to make sun covers, well...

See my one-million -part series on "sewmanship," because a sewing machine will be necessary and a sewing machine will change your entire yachting life. For the good! Or anyhow, mostly for the good.

If I had it to do over again, I would spring for a Sailrite machine from the start. Sewing, however, is a personality test, and it is hard to know in advance if you are really going to enjoy such often tedius, bulky and accessory-intensive handiwork.

http://www.ericsonyachts.org/infoexchange/entry.php?126-Sewmanship-1%96the-Sewing-Machine
 
Last edited:

woolamaloo

Member III
I would not use butyl tape again for this purpose--nothing wrong, but it oozes.

If contemplating, it would not be a bad idea to run an eye over my second (more recent) experience with hatch lens replacement, at least for the links provided.

http://www.ericsonyachts.org/infoexchange/entry.php?377-Thelonious-II-Main-hatch-forming-Vetus-cowls

Also, if tempted to make sun covers, well...

See my one-million -part series on "sewmanship," because a sewing machine will be necessary and a sewing machine will change your entire yachting life. For the good! Or anyhow, mostly for the good.

If I had it to do over again, I would spring for a Sailrite machine from the start. Sewing, however, is a personality test, and it is hard to know in advance if you are really going to enjoy such often tedius, bulky and accessory-intensive handiwork.

http://www.ericsonyachts.org/infoexchange/entry.php?126-Sewmanship-1%96the-Sewing-Machine

Okay. I missed that post. I'll go with 795 only. I was a little concerned that since my hatches are now both going to be 1/2" thick that the butyl could be oozing for years. Using 795 only solves that problem. (Maybe Maine Sail will weigh in.)

As far as the Sailrite machine goes, I love the idea of the LSZ-1 and I look at it a couple times a year. However, I followed your lead on your Sewmanship 1 post and also bought a Singer 237 - for $16.49 on eBay. I've enjoyed the sewing tremendously and the Singer has been terrific. Besides curtains and pillows for the boat, I've made a cover for the tablet that I keep at the helm and a bag to hold my charts. Besides the mending and alterations I've been enlisted to do, I've even made a couple baby dresses for friends who were having daughters.

dresses.jpg
I have a pattern for a Hawaiian shirt that I may make with the fabric that matches my boat curtains. My mother gave me a smoking jacket pattern for Christmas. Maybe a smoking jacket with a fez is just what I need...

This winter, beside the hatch covers, I'm making sheet bags and I'm modifying my binnacle cover to accommodate my auto-helm and the folding cockpit table. I may step up and make a spinnaker sock. Honestly, I do lust for the Sailrite and I rationalize it pretty easily. The only thing that holds me back is that doing all this with a sewing machine I paid less than 20 bucks for pleases me.
 

Christian Williams

E381 - Los Angeles
Senior Moderator
Blogs Author
And I thought I was cool just letting out the waist of my tuxedo pants.

Great work. And everyone should note the progress of the sewing disease, once the infection really sets in.....
 

Bill Kitchens

Junior Member
Hi, was wondering what exactly is everyone using to rework those hatch tops. 1/4" or 3/8" Smoked lexan, standard poly?. I need to at some point replace the weathered clear that's on there now. The frames are in good shape and I like the wood look. Thanks.
John
E35-2
#413

I went the 3/8 50% tint and wood frame red Mahogany
 

JSM

Member III
3/8".....kinda

Just did the Lewmar super hatches on my 34-2 with 3/8" extruded acrylic using Christians Williams excellent video and posts. Fairly easy job that came out very nice. Took the old lenses to a local plastics shop and had them duplicated in smoked grey.
Keep in mind that what is now sold as 3/8" is actually .354"or 9mm. and is about 1/16" thinner than 3/8".
I was told that none of this material is made to US standards anymore when I tried to return the lenses to the shop thinking that they had used the wrong size material.
Although the lens sits a bit lower in the frame everything came out just fine.
 

woolamaloo

Member III
My old foredeck lens was 3/8" and the main hatch lens was 1/2". My new lenses are both 1/2" thick Lexan. I mounted the new lenses in the frames with Dow 795 and let them cure for two weeks before I got ready to reinstall them on the boat. I thought I'd share a couple issues I had.

The minor, more obvious issue is that as I was cleaning the old silicone off the bolts, I noticed that the bolts were two different lengths. (Don't know why I didn't think about two different thicknesses needing different bolts.) If I would have got to the boat before I noticed, I would have been really irritated. The longer bolts were metric M6x20 1.00 pitch. I needed four for the foredeck hatch. (The hardware store had two.)

The other more important issue was that my hinges really didn't like the 1/2" Lexan. They seemed to be sized for a thinner material. When attaching the hinges, it took some effort to compress the 795 under the Lexan to get the hinges to be flush with the surface of the Lexan so I could bolt them down. Luckily, the 795 is flexible enough that it was possible. A stiffer sealant would have been a problem. 3/8" would have been a better choice. Another solution would have been to clamp the Lexan tighter into the frame while it cured. I only put a few books on it.

Along with the Sunbrella covers I made, I'm quite pleased with the results. Now, only 51 days until launch.
foredeck-hatch.jpgforedeck-hatch-cover.jpgmain-hatch.jpgmain-hatch-cover.jpg
 

Christian Williams

E381 - Los Angeles
Senior Moderator
Blogs Author
The Sailrite video is useful. I put shock cord in the hem rather than a line.

There is another style, in which the corners aren't darted, but instead the piece is made of a top plate and a perimeter strip. It's less forgiving to make, because if the top plate is too small you have to start over. How I know that you can imagine.
 

woolamaloo

Member III
The Sailrite video is useful. I put shock cord in the hem rather than a line.

There is another style, in which the corners aren't darted, but instead the piece is made of a top plate and a perimeter strip. It's less forgiving to make, because if the top plate is too small you have to start over. How I know that you can imagine.

I used nylon cord because the video called for it and I had it on hand. But I agree, the shock cord would definitely be better.
 

Kevin A Wright

Member III
Take your pick Lexan or Acrylic both have their pro's and cons. But if you want privacy, you want a frosted finish which may be difficult to find. It's actually easy to produce using a common sandblaster, just remove the protective paper finish and hit it with the sand for a minute or two.

If you want to get really clever, cut the outline of the Ericson logo in the protective paper first, then remove the background leaving the logo still protected before you sandblast. Did this when refinishing my hatches on my old E27. It not only looks cool and custom, it projects an "Ericson" signal - sort of the reverse of the Bat Signal - that moves around the cabin with the sun.

aft hatch inside.jpgEtch logo finish.jpgfwd hatch outside.jpg

Kevin Wright
E35 Hydro Therapy
 

Attachments

  • Etch logo start.jpg
    Etch logo start.jpg
    67.1 KB · Views: 40
  • fwd hatch inside.jpg
    fwd hatch inside.jpg
    51.7 KB · Views: 16
Top