After much searching and little luck I decided to create my own engine instrument panel box. So here is how to create a custom engine instrument panel box with some 1/8 inch fiberglass sheet, fiberglass cloth and epoxy resin. Oh and of course duck tape. Sorry I didn’t take photos of each step…
1) Draw the inside of the box first on the fiberglass sheet. I decided I needed room for the Yanmar engine panel and four gauges. So I drew a rectangle to accommodate these and then used a round object (I think it was a thru-hull plug) to radius the corners.
2) I then cut this piece out (I used tin snips). I looked around the house and found a clip used to hold documents together that I could clamp a pencil into and drive it around this piece lying on the fiberglass sheet to draw the lip of the box. A carpenter’s compass would work great for this.
3) I then cut this piece out.
4) I decided that I wanted to be able to put a Plexiglas cover over the box so to have enough clearance I cut some 2 inch strips for the sides just as long as the straight edges.
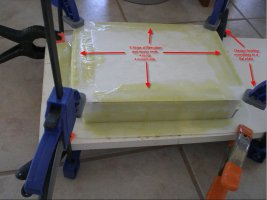
5) Next I ducked taped this affair together and then clamped it to a board so everything would be more or less in the same plane.
6) Then I applied strips of glass mat and epoxy resin to the joints so I could remove the duck tape after it set up.
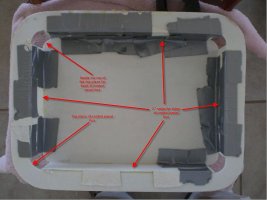
7) Next I cut small strips of fiberglass sheet for each corner (3 each) and duck taped these in place and then glassed them. Let set up.
8) Next I put a layer of fiberglass/resin across the back as well as the sides and the lip of the box. Let set up.
9) Next I mixed up some resin and microballons into a thick paste and filleted the inside corners for additional strength.
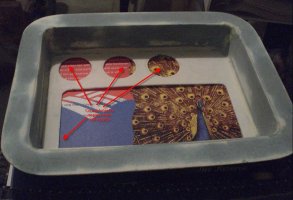
10) Next I cut out the holes for the panel and gauges.
11) Next I used a fiberglass type filler to smooth out the face of the box and corners.
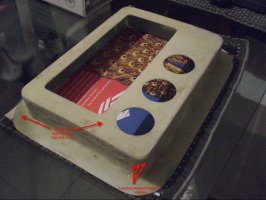
12) I then sanded and painted it.
Believe it or not the key to this project was the duck tape. It held everything together long enough to bond it with glass and resin. I hope this may help someone who is in the same predicament I was.
Robert
1) Draw the inside of the box first on the fiberglass sheet. I decided I needed room for the Yanmar engine panel and four gauges. So I drew a rectangle to accommodate these and then used a round object (I think it was a thru-hull plug) to radius the corners.
2) I then cut this piece out (I used tin snips). I looked around the house and found a clip used to hold documents together that I could clamp a pencil into and drive it around this piece lying on the fiberglass sheet to draw the lip of the box. A carpenter’s compass would work great for this.
3) I then cut this piece out.
4) I decided that I wanted to be able to put a Plexiglas cover over the box so to have enough clearance I cut some 2 inch strips for the sides just as long as the straight edges.
5) Next I ducked taped this affair together and then clamped it to a board so everything would be more or less in the same plane.
6) Then I applied strips of glass mat and epoxy resin to the joints so I could remove the duck tape after it set up.
7) Next I cut small strips of fiberglass sheet for each corner (3 each) and duck taped these in place and then glassed them. Let set up.
8) Next I put a layer of fiberglass/resin across the back as well as the sides and the lip of the box. Let set up.
9) Next I mixed up some resin and microballons into a thick paste and filleted the inside corners for additional strength.
10) Next I cut out the holes for the panel and gauges.
11) Next I used a fiberglass type filler to smooth out the face of the box and corners.
12) I then sanded and painted it.
Believe it or not the key to this project was the duck tape. It held everything together long enough to bond it with glass and resin. I hope this may help someone who is in the same predicament I was.
Robert
Attachments
-
 Step 1.jpg52.1 KB · Views: 176
 -
 Step 2.jpg55.7 KB · Views: 146
 -
 Step 3.jpg78.9 KB · Views: 140
 -
 Step 4.jpg71.2 KB · Views: 150

