This was an easy project and really lightens up the cabin.
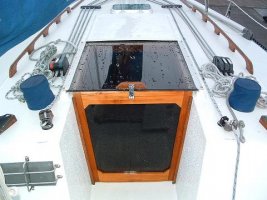
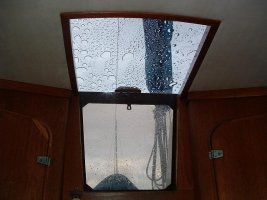
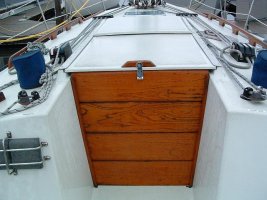
I used a piece of 1/2 inch smoked polycarbonate with AR rating (abrasion resistant). I finish cut the piece on the table saw and rounded the edges with the router table. The sliding hatch cover had to be removed and re-bedded and was easily done. The new sliding hatch needs a stop to keep it captive undet the hatch cover. The material supplier recommended using bushing with the screws into the poly. The other light weight poly hatch board replacement is from 1/4 inch material also cut with wood-working tools.
It is framed with 3/8 inch teak.
Material came from Multicraft Plastics in Portland, OR.
Before and after pictures attached.
Steve Jones
Edgewalker, Olson 34, Hull No. 1
Longview, WA
Attachments
-
 Edgewalker Hatch 8-23-04 004a.JPG36.1 KB · Views: 913
 -
 Edgewalker Hatch 8-23-04 002b.JPG47.9 KB · Views: 755
 -
 Edgewalker2003 006b.JPG56.8 KB · Views: 737
")
