• Untitled Document

    Join us on April 26th, 7pm EST

    for the CBEC Virtual Meeting

    All EYO members and followers are welcome to join the fun and get to know the guest speaker!

    See the link below for login credentials and join us!

    April Meeting Info

    (dismiss this notice by hitting 'X', upper right)

E39 resurrection

tabaka

Junior Member
I'm new here but I've been lurking for a few weeks already. I've already found a lot of valuable information and want to say thank you to everyone that puts up pictures and how-to's.

My last sailboat was a MacGregor 19 powersailer and right now I'm feeling a tad overwhelmed but still managing to look forward to the work ahead.

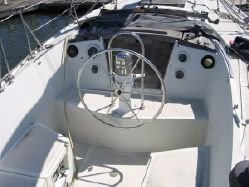
I recently acquired an E39 flush deck. Hull #16.
I'm pretty sure it's essentially been abandoned for years with someone occassionally picking up a grinder to cut another notch in her. I got her for about a quarter of her scrap value so I'm doing all right so far. Essentially everything is there along with some really nice "new in box" upgrades she never got to try out. It's all just essentially stripped to a bare hull on the hard.

This weekend I dug out the leaking galvenized steel fuel tank among other projects. It's only a 24 gallon tank and I want to increase the capacity. I see a lot of chatter about using aluminum or stainless to build new tanks but not a lot of concensus about which. I have a lot more experience working in stainless and would prefer that unless there is a compelling argument against it. Any suggestions on a guage of material to use for a 40 - 50 gallon tank? I've seen 1/8th as an industry norm for alminum with an overbuild recommendation of 3/16ths but no recommendations for stainless. Any suggestions?

The thru-hulls are in great shape but the sea cocks are all locked up. I'll try to keep the bronze below the water line but for above the water line, I'm curious if anyone has tried building thru hulls using g10 pipe and then connecting them via hose to a valve. Seems it would be less prone to tortional damage from reefing on a stiff ball valve. The stuff is rediculously strong and could even be bedded in at an angle to increase flow/suction. It's essentially how the prop shaft tunnel is formed and that can take quite a beating. Is this a terrible idea? With filleting and a solid backer plate bedding it in it seems it would work really well. If I try it, is there a risk of UV damage or anything to watch out for?

The mast step and forward bulkhead steel plate are just masses of rust scale. I'll be cutting the sole out soon to rebuild them. The rear plate is actually bolted up into the bulkheads through the back edges of the settees and looks like a royal pain to remove. The front one doesn't seem to be bolted to anything at all though. is it just glassed in to keep the forward edge of the keel from twisting?

hmmm... what else?
I have two aluminum pipes running from holes in the transom all the way up and into the cabin. They appear to be some sort of cabin ventilation. I haven't seen them on any other boats and they seem like a really bad idea in heavy following seas. My initial reaction is to just glass over the holes and remove them. Anyone know if they're needed? Would a hatch vent system work to replace them if they are in fact just vent pipes?

I have a huge project ahead. It may have been easier to just build a boat from scratch but I have always had a soft spot for bringing old abandoned stuff back to life. I have essentially a full shop at home and about the only thing I'm missing is a mill. I'm confident I have the skills and the tools to pull this off. I will appreciate your responses.

this is getting long winded so I'll close by asking if anyone has an E39 in the Portland, Oregon or Seattle, Washington area? I'd love a tour of an assembled vessel so I can start figuring out what some of this hardware is. I have boxes and boxes of stuff I have no idea where it came from and I've been trying to match stuff up to the stains and hole patterns on the deck.
Thanks,
Dan
E39 in Portland, OR on the hard.
 

Loren Beach

O34 - Portland, OR
Senior Moderator
Blogs Author
Inquiring minds... and all that...
:rolleyes:
did you buy the repo'd one from Schooner Creek BW?
If so, one of the prior (and very active) owners of that boat is a member of our YC.

Or was it the one just sold by Passion Yachts?
(at least that one was floating... in their pix)

Loren
 
Last edited:

tabaka

Junior Member
It was the one listed at passion yachts. Hasn't floated in at least 3 years from what I can see.
Looks like it was a live aboard then left unmaintained. The previous owner full of stars in his eyes put it on the hard to start a blister treatment about 3 and a half years ago and hadn't touched it since.
 

gadangit

Member III
Hi Dan-
Welcome to the forum!
We started with a kit boat as well and worked our way up to a real life functioning sailboat. It is possible, but you are right it is a bit overwhelming.

If you have any specific questions just throw them out there.

We too cut out the cabin sole, just keep a decent size border so you have something to re-attach to. My theory is the one piece sole did/does tie the hull together, so you will want to think about that and maybe come up with your own theory.

Cutting out and replacing the aft beam is not that difficult. My sawzall is my favorite tool, get a good one. You will use it all the time. Replacing the beam with G10 is pretty straightforward. I was puzzled by the forward athwartship beam as well, it only tied to the port bulkhead, the starboard side just floats above the hull.

Good luck!
Chris
 

Glyn Judson

Moderator
Moderator
Choosing tank metal.

Dan, Welcome aboard, there's plenty of room here and we look forward to helping as best we can. That said, I've been told that stainless steel tank welds do not like diesel fuel and I'd love to have others who know more on the subject, support or debunk my understanding. Again, welcome aboard, Glyn Judson, E31 hull #55, Marina del Rey CA
 

Loren Beach

O34 - Portland, OR
Senior Moderator
Blogs Author
Tanks... for the memories....

When I had our new diesel tank fabricated by Coastline ( http://coastlinemarinetanks.com ) I recall them saying that the best material for diesel fuel tanks was aluminum, 5000 series alloy as I recall.
Our custom water tank was built in ss. Different contents and different material.

Not that you asked, but If you reach the point of wanting a new holding tank, you want a roto-molded plastic tank, from Ronco.

Link to our tank replacement project:
http://www.ericsonyachts.org/infoexchange/showthread.php?6303-Diesel-Tank-replacement

Regards,
Loren
 

Cory B

Sustaining Member
We were docked next to that boat for a couple of years in Hayden Bay. It was neglected for a long time, other than someone occasionally coming down to fire up the diesel. I'm glad to see its getting a second (third?) chance at life.

Yes, its been out of the water for close to 3 years if memory serves.
 
Last edited:

bigd14

Contributing Partner
Blogs Author
Good to see another Ericson about to be brought back from the brink. Are you at Tomahawk Boatworks? Not sure if he is still there, but if you need any metalwork, talk to Leonard in the back corner of the yard. Great guy and does wonders with stainless steel. Also, get to know Scott at Sexton's they can get you most anything you need. And watch out for the osprey, they like to leave big smelly gifts on deck every now and again. :esad:

Couple good resources for this type of thing that helped me go through a similar process. I could never have done it without these forums and the Ericson forum.

www.plasticclassicforum.com/forum/

www.lackeysailing.com

http://forums.sailinganarchy.com/index.php?showforum=56

Also, looks like you will be needing some epoxy.:egrin: May I suggest Raka epoxy. Cheaper than West, has less amine blush to clean up when cured and you can custom mix the fast and slow hardeners to get the perfect cure time for the conditions.

Good luck and please share your progress regularly.

Doug
 

toddster

Curator of Broken Parts
Blogs Author
Cool. By the time I saw that ad, it was listed as "sold," and I thought "whew, dodged a bullet there!" :egrin:

Congrats on your new vocation, er... I mean boat!
 

Christian Williams

E381 - Los Angeles
Senior Moderator
Blogs Author
That is one interesting helm position, all right.

attachment.php


Attachments

  • e39 helm.jpg
    e39 helm.jpg
    12.6 KB · Views: 459

gadangit

Member III
I've seen that helm placement on a few other boats and it always struck me as weird. Presumably this is so one can steer in the protection of the dodger?

That is definitely one of the advantages. Some others:
It feels like a smaller boat when driving and docking.
The cockpit mayhem (when racing) is all happening behind you which enables the driver can concentrate on driving.
You can reach the mainsail controls quite easily and the primary winches are just a half step away.
There is a footwell in the T shape, so you can sit and lean against the cockpit while driving. This is actually very comfortable.
People down below can hand up a ham sandwich directly to you.

I really like the helm position and am glad it was designed that way.

Chris
 

bgary

Advanced Beginner
Blogs Author
I "heard", once (no idea if true or not) that for a brief moment in time designers thought it was a good idea to move the helm forward for racing reasons.

At the time there was a rule for curtailing a luff - if a boat starts to pass another to windward, the leeward boat could "luff"... but as soon as the windward boat's helm was abeam of the leeward boat's mast ("mast abeam!"), the leeward boat had to stop luffing and return to its proper course. So... the farther forward the boat's helm station was, the earlier that "mast abeam" event would occur in a passing maneuver.

It also got the pedestal and other associated weight out of the stern. Not sure how much difference that made on a 19,000-pound boat, but... okay.
 

Guy Stevens

Moderator
Moderator
Thoughts on your project from someone that has done the same project

SS tanks have a lot of coast guard rules (part 46 etc, also abyc stuff). Basically you can't have an approved SS tank.
https://www.law.cornell.edu/cfr/text/46/119.440
If you want the actual regulations involved in tank construction.

On our 39 we made 2 30 gallon aluminum 5086 tanks and placed them on a support (New plywood sole), right below the fwd end of the cockpit. (I think this was where the tank or the batteries originally were. This was optimal. If made correctly they fit in and out of the cockpit lockers. We also assisted another 39 in doing the same thing with plastic tanks in the same place. Either would work. The Aluminum worked better for us at the time as we had free fabrication available to use. I would probably do them in plastic where I to do them today.

The pedestal location was the best of any boat I have ever sailed. As is the one in the 46 her bigger sister. It allows you to easily single hand the boat, as there is nothing between you and the sheet winches, and you can easily operate the main sheet while steering. I sailed her single handed for a lot (Thousands), of miles. Everything was easily made to be handy from the helm. (Oh and yeah the magic food windows or companionway allow someone to hand a veggie sandwich or a hot tea right up to you!)

When cutting out the sole, a good boarder is a must. Try and make the cuts using battens so that it is straight and nice looking. ( this is a common project and I have seen some that looked like they were chewed out by beavers). I also recommend having a couple of ss water tanks made up while you are in there. You should be able to get at least 75 gallons of water under the sole without any issues. This comes in handy while cruising, and isn't a bad expense to reward trade off even with a watermaker.

Make the new fwd bulkhead cross tie, and the new mast step out of G-10. Should last for the duration. (Note you could also replace the mast step with a section of Alumium I beam, it is a standard size as it is currently a steel I beam. That is also an easy way to do it, and should only last about 40 years if maintained at all.). I have inspected that installation on 3 or 4 of the 39s and if done right is nice too, and can be had fairly easily and cheaply as you need so little of it.

A lot of the boats have been modified by previous owners in really strange ways..... Ways that I would not recommend. (Eg your aluminum tubes...) Having been a lot of miles offshore in one that was not too modified, and having delivered and crewed on several that have been heavily modified, I can tell you that modified = completely messed up in most cases. Especially trying to redesign and interior better than Bruce did. Opinions vary on this however. The interior as designed by Bruce King is one of the best ergonomic interiors that I have sailed on. Even somewhat better than the 46.

Lots of people when they set out to do these projects think that they can come up with a lot of really great ideas that involve using techniques that are not standard practices. (Eg your idea for the above water line valves). I highly recommend against these ideas, generally they do not end up working well, and in the end are a big part of what causes the owners to lose interest in the project and quit working toward the goal. Don't get wrapped up in the minutia that others have already solved 100 or more years ago. (There will be tons of minutia that you will have to deal with in the process already). Also these "neat ideas", devalue the boat a lot. Even if your particular "better, cheaper, custom" Idea works well, it will cost you when you go to sell the boat. People will look at it and think; "why did someone kludge this up like this, instead of using the tradition time proven method to achieve this?" Also remember that those above the water line thru hulls are not necessarly above the heeled waterline, and there are not many of them on the 39 that are above the heeled waterline.

Also use the best materials available. Most people doing these kinds of projects get to trying to do them on the cheap because they got the boat cheap. If you go about it in this fashion, in the end you have a cheap boat with a bunch of cheap parts on it, not something that you are going to be proud of or that is going to fetch the best dollar when you go to sell her. Note however that you are never going to get out of the boat what you are going to put into it. There is a reason that people flip houses and not boats. That said however, if you are starting the project for the long haul and that this is a boat that you are going to get back to a good or excellent functional vessel, you are going to put a lot more work into the boat than the cost of the best parts. Honoring your work, and having something that is done right and well, is what will keep you working on a project of this size.

Having done this very thing 2 times personally with a 39 and a 46 and more times than I can count in some professionally capacity, I can tell you it isn't going to be cheap. At the end you won't want to add up your receipts, but if you do it to your best possible work standard you may end up with exactly the boat that you want. There are great bones in that 39, and if you bring her back she will take you anywhere that you would ever want to go.......

Ask questions, as I have time I will answer. Some of the questions you are probably going to ask I have answered here before.

Pneuma Moorea.jpg
Moorea via Seattle, Mexico, and a whole lot of really great islands and diving. The waterline needed cleaning as things grow on there on long passages.
 
Last edited:

tabaka

Junior Member
Thanks everyone. It's good to see an active community for these. I shouldn't have be surprised that so many of you have seen this one kicking around.

My plan is to cut the cabin sole close to the antiskid border molded into the floor. That should give me a good 2 inch border all the way around for fastening in a new sectional floor of some sort. I haven't finalized my plan for the new floor but I'm hoping to keep it in some format that allows me to open it and clean the bilge or maintain the water tanks regularly.

Speaking of the water tanks. The original tanks are stainless. I haven't pressure tested them but they appear to be holding. One problem with them however is that it was not winterized at some point and left with full tanks to freeze. Both look as if they are over inflated balloons. The rear tank has expanded up enough to lift the floor. I won't know if I can salvage them until I can get them out and run some tests. The water drained clean and clear out of each despite them both being under water for who knows how long. At minimum I'll need new fittings and a rubber mallet.

The bilge sat for a long time with fuel and stagnant water. After I clean it, does anyone have recommendations for bilge paint? Do you have to sand or prime first? Seems to me that paint wouldn't stick well in there no matter how good I get it cleaned.

G10 is on the shopping list for the step and bulkhead. Thanks for the input.

Guy, with your dual fuel tank setup, do you have a transfer pump or something? How do you tie the two tanks together? Your installation sounds like a great use of all that space under the cockpit. That is where my tank came out which appeared to be original. 2 tanks seem like they'd be a lot easier to manage than one big 50 or 60 gallon tank greased and threaded through the engine compartment opening.

The helm location feels pretty awkward loading and unloading bulky items from the cabin. The grab rail on it sort of helps make up for it though. It does seem like it would give a lot better access to all the lines for single handing. Hopefully some day I'll be able to test that. :D I can see the advantage of being right by all of the instrumentation as well even though I'm removing all of that dead equipment now.

I finished pulling all of the old wiring. That was a rats nest. The entire AC and shore power system was put together with cut up pieces of extension cords and household J boxes. The eye roll emoticon isn't strong enough for my thoughts on that.

My shiny new Marineshaver showed up yesterday so I can finish the gelcoat peel... that's exciting but I promised folks I'd go camping this weekend so I'll have to be patient getting back to the patient.
 

Christian Williams

E381 - Los Angeles
Senior Moderator
Blogs Author
Chris and Guy,

It looks like the wheel location would block access to the companionway.

I take it that, as a practical matter, it doesn't?
 

gadangit

Member III
Chris and Guy,

It looks like the wheel location would block access to the companionway.

I take it that, as a practical matter, it doesn't?

Hmmm, not all that much. Similar to having to step over a cockpit mounted traveller in that you just get used to it. But if you do have a larger bulkier item like a sail it is in the way. But like everything on a boat, moving around is half gymnastics. Keeps us young!

I can't say for sure, but I think the original wheel was somewhat undersized to allow for more room on the sides. We upsized the wheel a few inches which really helps with sitting on the side and steering. Lisa still can't get as comfortable and reach the wheel like I can.

Chris
 

Guy Stevens

Moderator
Moderator
Wheel

I just put a knurled nut on mine instead of the standard nut, if you had something really bulky or were doing a major project, you just took the wheel off and lashed it to the pushpit. We did that probably did that half a dozen times in the time we owned the boat.

It was not any worst getting in and out than any other boat, less so if you were at anchor or a dock as it became another good hand hold.

Guy
:)
 

Guy Stevens

Moderator
Moderator
I think the original wheel was a 39" wheel?

I think the original wheel was either a 36 or 39 inch wheel. Same as the one on my 46 by the way. LOL

Guy
:)
 
Top