• Untitled Document

    Join us on April 26th, 7pm EST

    for the CBEC Virtual Meeting

    All EYO members and followers are welcome to join the fun and get to know the guest speaker!

    See the link below for login credentials and join us!

    April Meeting Info

    (dismiss this notice by hitting 'X', upper right)

How to remove anchor locker, rebed bow fittings?

Frank Langer

1984 Ericson 30+, Nanaimo, BC
Hi,

I want to rebed the bow pulpit and cleats, and can't really get at them from the underside due to the anchor locker being in the way. There is very little space between the anchor locker and the hull to get my hand and a wrench in there to the underside of the deck.

I am thinking it would be an easier job to rebed all the fittings if I can take out the anchor locker. On examination, it looks like it is held on place by about 24 screws from the top, through the lip and into the fibreglass. Most of these screws are currently underneath either caulk or silicone, but I think I can scrape that away and get them out.

However, on examination from below, it looks as if the anchor locker is also caulked into place with two different kinds of caulk--one is clear and looks like silicone, the other is white and looks "goopy and solid"--I am worried it might be 5200.

Even if I can get the screws out, there doesn't seem to be a way to get a tool like a putty knife between the anchor locker edge and the underlying lip--ie the two parts that are caulked together--to pry them apart.

In doing a search on this site, some reported that it was a very tough job, others said it wasn't so bad, perhaps depending on what was used to seal the anchor locker. Can anyone provide any advice on how I can best get it out--tools to use to get between the two lips and to pry it apart without cracking the fibreglass anchor locker.

Any other ideas on how to re-bed the bow area without removing the anchor locker might also be helpful.

Thanks,
Frank
 

mherrcat

Contributing Partner
Yeah, there isn't much room around the lip of the locker to get a tool in there. Some kind of 90 degree razor tool would probably do it; maybe some kind of dental tool or wood carving tool perhaps? I have also been using a product called Marine Formula by Debond to remove my windows and it seems to help. You have to be patient, use several applications and use a razor of some kind to keep trying to cut through the sealant. Lots of careful prying, too. They say it works on 5200.

The white sealant is probably from the original installation; the clear stuff is a previous owner's addition. At least this is what it looks to be on the windows I have removed.
 
Last edited:

Frank Langer

1984 Ericson 30+, Nanaimo, BC
Thanks, Mark. I agree that the white stuff looks like the original, the clear silicone a previous owner's "touch up" attempt. I will check out that de-bond stuff, though I'm not sure there will be any room to get it into the space where it's caulked. Your suggestion of a 90 degree tool is likely the route I need to try. What I'm not sure about is whether I have a good likelihood of getting the anchor locker out in order to get to the underside of the deck more easily, or whether I risk doing real damage to the anchor locker, won't get it out and still have to squish my hand into that narrow space to get to the underside of the deck. If that's the case, I would rather not waste my time on trying to remove the anchor locker.

I think Tim Reilley in an earlier post said that he had so much trouble getting the anchor locker out that he ended up cutting a hole in the anchor locker to reach the underside of the deck, and then re-fibreglassed the anchor locker. It would be helpful to know if his was unusually difficult, or whether most are like that, in which case I would avoid beating my head against this brick wall.:esad:

Thanks again for your reply; I'm stil open to any other ideas on this.

Frank
 

Loren Beach

O34 - Portland, OR
Senior Moderator
Blogs Author
Breaking Loose...

In general, you may find that putting an access plate in each side of the locker will aid any future need to get at the underside of the adjacent decks. I seem to recall someone here saying that they did that.

As to breaking loose the lip from the recessed flange in the deck...
I had a kinda-sorta similar difficulty with getting the sink out of our galley where three sides were very close to the fiddles. I finally took a good quality springy putty knife and bent the end at 90 deg. with just enough of the new 90 to go under the flange - about 3/4" in my situation. Then I got it started under one part and tapped it on the side with a short-handled 3# hammer. Worked it down one side, around a corner, down another side, and cut through the sealant bond.
This did not bend or warp my ss sink. You are trying to preserve the gel coat on the deck flange and and crack the edge of the anchor locker -- perhaps a similar problem. Maybe.

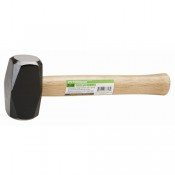
Sidebar: a stubby handle "drilling hammer" that I found on the cheap at Harbor Freight is one of the handiest percussive-repair tools on the whole boat! :rolleyes:

Happy Dismantling,

Loren
 

Attachments

  • Drilling Hammer.jpg
    Drilling Hammer.jpg
    3.5 KB · Views: 596
Last edited:

Frank Langer

1984 Ericson 30+, Nanaimo, BC
Thanks, Loren. It will be a tough decision, whether to try to remove the anchor locker, which would give the best access, or cut access holes in the sides which I could then cover with a deck plate or something. Lots to think about!

Frank
 

KanH

Member II
I removed the anchor locker from my 30+ last year. Since I have access to the bow through a small removable panel in the V-berth I was able to apply upward pressure on the bottom of the locker. If you do not have the same I would recommend adding one. You might find that after taking out the screws and using the de-bonder you should be able push the locker from below while having someone carefully prying from above.

It is a big job but well worth the effort. With it removed I was able to rebed the stanchion bases which were in serious need of getting done. In addition I was able to replace the drain hose that had hardened and cracked over the years which greatly contributed to water intrusion. I was also able to clean out the through hole which was badly clogged from debris that comes up with the anchor.ffice:oops:ffice" /><O:p></O:p>
 

Frank Langer

1984 Ericson 30+, Nanaimo, BC
Thanks, guys. It looks as if it would be worth me trying to remove the anchor locker to get good access to the underside of the deck. If anyone has any further tips to achieve this, please let me know.

Frank
 

Dan Morehouse

Member III
Frank-I've got a similar problem with the hinge fasteners on the anchor locker lid. Hinge broke, couldn't reach the nuts below deck due to the anchor locker "tray" making access impossible. I was able to get the nuts off by reaching through the locker door in the v-berth, but there's no way I'll ever get any back on. The factory must have mounted the locker lid & stanchions etc. first, then sealed in the tray.

Although it's a bigger job, I intend to dispense with the tray altogether and glass in a new locker bottom whose lowest point ends at the spot where the drain tube passes through the stem of the boat. This will accomplish the following:

-make the overall volume of the anchor locker larger.
-eliminate the need for a hose to drain the "tray".
-afford some sensible access to all the nuts under hardware in the area.

I will lose some space in the locker @ the foot of the v-berth, and the new anchor locker bottom will have a pronounced slope. Don't know if you can afford either on your boat, but it might be worth a thought.

Dan Morehouse
1981 E-38 "Next Exit"
 

Glyn Judson

Moderator
Moderator
My two cents worth.

Dan, What you describe wanting to do to your anchor locker is exactly the way Ericson did it in our former boat, an 1979 E25+. There was simply a flat floor to the locker, the sides of which were the inside of the hull itself. There was a 1/2"(?) hole smack-dab in the bow that aligned with that floor. When under way, a bit of water would happily slosh in through that hole and then right back out again. Obviously the hole was above the static water line and easily drained completely when at rest in the slip. Glyn Judson, E31 hull #55, Marina del Rey, CA
 

exoduse35

Sustaining Member
My thought would be to visit an auto glass shop. They use a variety of tools to release the sealant that holds in auto windshields. One that comes to mind is a wire cable that will cut through the sealant. Might be worth a shot to see if any of their tools will fit the bill. Good luck, Edd
 

mherrcat

Contributing Partner
I also thought about the wire thing; maybe a .010 or .011 guitar string, but there are two 90-degree angles to negotiate and it would be difficult to get to the end of the string under the deck. (This would probably work well for a deck hatch if it has a flat base rather than a flanged base; I plan to try it on my deck hatches when I rebed them.)

I think the best way is to use Loren's method; bend a thin piece of metal, sharpen the working edge and work it around under the lip. The lip is only about 1/2" wide.
 

Ian S

Member III
Hi Frank we seem have the same projects going. You should remove the locker. I did mine a couple of years ago and found that the original seal was infact broken and small amounts of water had been coming in around it as well as having an infestation of mildew up in the forepeak. Just work your way around the molded locker flange slowly ( they are built pretty tough) if you can find a tool that has a 90 degree bend in the end of it that would help a bit. This will allow easy access to all your mounting hardware, at which time you should over drill and epoxy fill all the holes for you cleats, hinges, and pulpit bases. delam in the forepeak is very common and intrusive due to the pulpit taking allot of abuse, docking, spinnaker tack lines, anchors etc. I also found the original drain line was allowing water in too. You will need an xtra length of tubing, i found the only way to get it back in was to start with a long length, fish it through while lowing the locker back in placee ( a helper below was need to pull) and cut it to length at the bow flush. While I was in there I decided to install a washdown pump connection. it was a quick connect type fitting that shuts off the flow when the fitting is removed from the socket, so glad i did it since everything that goes in that locker tends to get very scuzzy. When the wind dies 12 miles out the boat comes home washed. Lastly I added a gas cylinder to hold the locker cover open, dampen it when closing as well as supporting some of it's weight. Be advised you will need to reinforce the cover to accept the gas shock fitting as the exert a fair amount of force due to their lack of leverage. I hope you go for it. it was a very easy project and just getting the mildew out was worth the trouble alone.

Capt: Ian
 

Frank Langer

1984 Ericson 30+, Nanaimo, BC
Hi Ian,

Thanks for your detailed post. I have opened up the forepeak from the inside at the V-berth, so I can see the deck from the underside. I know that the two aft bases of the pulpit show signs of leakage, the spinnaker pole holder may be leaking, the cleats look totally dry and I can't see the forward bases for the pulpit due to the anchor locker being in the way. The bottom of the anchor locker is wet, possibly due to the seal around the anchor locker or because it's running down from the pulpit base.

My challenge is that the boat is in the water (in British Columbia) and I will likely have at most a couple of sunny days before it rains again. Ideally, I would like to pick a nice day and remove the anchor locker, rebed all the deck fittings and replace the anchor locker. I'm just not sure that given the potential for the anchor locker to not come free, I will end up with it partially removed and then not make enough headway before it rains again, which would destroy the caulk and make a mess.

I'm contemplating just recaulking the two pulpit bases that I know are leaking, and then see what impact that has on any other leaks. If the anchor locker itself is leaking, then I guess it will have to come out. :esad:

I appreciate your encouragement to "go for it"; I guess I have to overcome my concerns and just dig in.

On a side note, I discovered today that the hinge on the hatch above the V-berth was a tiny bit loose, just enough to cause leaking. Weather was good, so I decided to try to remove the hatch cover, a job I hadn't done before. Fortunately it went pretty well--removing the teak moulding, opening up the headliner to get at the hinge bolts, overcoming "stuck" bolts, and then re-bedding and reassembling. It would be nice if the anchor locker went as smoothly!

Thanks again!
Frank
 
Last edited:

Frank Langer

1984 Ericson 30+, Nanaimo, BC
Thanks, Graham. Any tips for getting at the sealant under the anchor locker lip once I have removed the screws?

Frank
 

PDX

Member III
Washdown fitting?

Ian:

The washdown fitting socket idea sounds interesting. Who makes it and are you happy with the quality?

Thanks.
 

Graham Cole

The Zoomer
Lots of Olfa blades, those little 'wonder bar' pry bars, some spilled blood etc...Take your time, once you get a bit raised up, stick something under the gap to apply gentle upward shearing pressure and work your way around....Dont forget to remove the drain hose and replace bow light wiring if yours, like mine, is on the pulpit.
 

Ian S

Member III
Hi Frank. I would really like to encourage you to pop it out. Unfortunately there are a bunch of deck penatrations around that area and they should all be treated with epoxy. The first thing that ruins these boats is delam from water intrusion into the core. anything you can do to mitigate that is a good thing. especially if your keeping the boat for a while it will pay dividends in the end when she gets surveyed by the next potential buyer. I can almost guarantee their is a good amount of mildew in there plus the leaking is slowly filling your bilges adding interior moisture. after i did my locker the bilges stayed bone dry. it was in fact the single culprit.I think if you just drop the locker back in place with the lid closed you probably wont get a whole ton of water in there and again you bilge should handle it. Lastly I would re bed the locker with boat life caulk (polysulfide) and it's curing time is accelerated by moisture and can be applied underwater or to wet surfaces. It is the only product in my opinion for through hulls and deck fittings of all types. Since the bond is semi permanent and stays flexible. No matter what is bedded on a boat it will only be a matter of time before it will have to removed or serviced and this included keels. If I remember i slowly worked the flange apart with a couple of mini pry bars like you find for painters made by red devil.

Let me know how it goes. good confidence building project.

Capt: Ian
 

Ian S

Member III
Grahm so right!! wiring was terrible glad I opened things up to adress that as well.

PDX: I wish I could remember who made that fitting. The quality was outstanding. solid cast bronze. the guts were replaceable. it has a spring loaded plunger that is depressed when it's unique fitting is inserted and can be inserted with full pressure in the system. the special twist lock fitting has a hose thread on it of course. the receptacle has a little flap that goes over the opening when not in use, really slick! I love having this set up and i just use a flat cloth hose which is very compact. the downside with the hose is that it kinks easily. I think if you search around for wash down equip you will find it.

Capt: Ian
 
Top