• Untitled Document

    Join us on April 26th, 7pm EST

    for the CBEC Virtual Meeting

    All EYO members and followers are welcome to join the fun and get to know the guest speaker!

    See the link below for login credentials and join us!

    April Meeting Info

    (dismiss this notice by hitting 'X', upper right)

e23 front hatch options

austinmotion

Junior Member
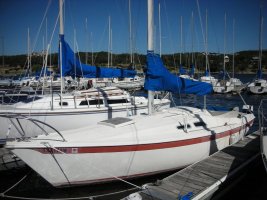
I've attached a picture that shows the front hatch on my e23. I'm not sure if this is the original hatch or not but it has kind of a silver mesh over a yellow translucent material that provides some light into the cabin. It looks a bit tired to me so I was wondering if anybody has updated this hatch and if so, how did you do it. I suppose I could by a new hatch but they were ~$400 when I looked online. Thanks everyone!
 

Attachments

  • 002.jpg
    002.jpg
    88.6 KB · Views: 124

Glyn Judson

Moderator
Moderator
E23 hatch redo.

Dear Mr. austininmotion, If your hatch is shedding on the outside you can rejuvinate it by simply taping off the white edges and applying epoxy resin. It'll encapsulate the glass fibers and with a little effort, give you years more service. Glyn Judson, E31 hull #55, Marina del Rey, CA
 

sleather

Sustaining Member
I Hear You!

Ivan, I'm in the same boat!LOL I've thought about it for a long time(no solution-yet)! Glyn's suggestion is good(may do that) Before you "refinish" take a stiff wire brush to the non-skid and bleach'er out good(mines kind-of mildewy). Actually there was a "thread" awhile back about using "Future" acrylic floor finish on non-skid(easier than epoxy). I did add closed cell foam to the underside to get a real seal(1"dia. pipe insul., cut-to-fit)

The problem w/ a GOOD aftermarket(beside the price) is having to remove the coaming and finding one w/ the right curvature!

I'm concentrating on revising the "main" sliding hatch to something more pleasing.
 

Glyn Judson

Moderator
Moderator
Giving new life to your hatch.

Steve, That's not an original idea of mine, there's a 30 foot Newport three slips away that the former owner did that very thing to many years ago. The result was that it came out looking like new and it still does to this day. Glyn Judson, E31 hull #55, Marina del Rey, CA
 

Mark F

Contributing Partner
Blogs Author
I just painted mine with one part urethane paint. Before and after photos
 

Attachments

  • inspection photos 015.jpg
    inspection photos 015.jpg
    62.7 KB · Views: 108
  • DSCN2830.jpg
    DSCN2830.jpg
    91.6 KB · Views: 113

austinmotion

Junior Member
nice!

That looks great Mark! I couldn't quite tell but did your have a smooth surface before painting? Mine isn't smooth at all it is kinds of like a wire grid with "straw" underneath. Perhaps mine is missing the top cover???

Ivan
 

sleather

Sustaining Member
It's all there!

Ivan, That grid is the non-skid(like the deck) and the straw is the fiberglass, which is naturally translucent. I may get a photo of mine tomorrow if you wish.
 

Loren Beach

O34 - Portland, OR
Senior Moderator
Blogs Author
hatch trivia, circa 1970

Ericson, Cal, Newport, and who knows how many other builders used to mold out their own hatches. Saved a lot of $ over building in wood or outsourcing a metal-framed hatch. To let in light, they would leave out the color in the center portion gel coat.
You can see whatever fiberglass material was just under the translucent surface, and this was normally a layer of mat. Thus the "straw" appearance decades later.

Loren
 

austinmotion

Junior Member
Ivan, That grid is the non-skid(like the deck) and the straw is the fiberglass, which is naturally translucent. I may get a photo of mine tomorrow if you wish.

Thanks Steve, that would be great. I've never seen a close up of what it should look like but something tells me that mine is in pretty bad shape. I'll take a picture of mine this weekend to show you what I mean. I wonder if I could pull the center mass out of the frame and replace it with an acrylic panel. I haven't examined it closely to see how it is constructed.
 

sleather

Sustaining Member
Cave?

Ivan, Sorry about the pic, life here is out-of-control, better now!
I have got to get me one of these pic sites(cool)!Couple of ?

Any history on the "repair" to the starboard bulkhead? I helped a guy here repair his after the PO tried to drop the mast w/o loosening the turnbuckles(required) What does the port side look like(that's usually the trouble spot).

Whats up w/ the fixed wood window coverings? If you "paint" the front hatch it's going to get really dark below! Lay something opaque over the hatch to see how you like it. I'd try Glyns approach(w/ the clear) first. You can always sand and paint it "later".JMHO

Do you have a trailer?
 
Last edited:

austinmotion

Junior Member
I don't have any info on the bulkhead repairs, in fact, I'm not even sure what a bulkhead repair looks like! :esad: This is my first sailboat so I'm learning slowly. :egrin:

Mine has these fixed wood coverings above the seats in the cabin and it appears there used to be cabin lights installed on each one. One of my (many) upcoming projects is to replace these missing lights. These don't cover the windows though, they are just below them.
 

sleather

Sustaining Member
Duh!

Whats up w/ the fixed wood window coverings?

OOPS!:0305_coffMore coffee! Duh!---optometrist perhaps:nerd:---perhaps a "visit" to MY boat!LOL

Those big aluminum angles(below the chainplate) aren't from the factory!:confused:
They look VERY substantial though!
 
Last edited:

austinmotion

Junior Member
Ah, Thanks for pointing those out. I figured they came like that from the factory but will give them a closer look to make sure there aren't any issues. I wish I knew someone that had an e23 in Austin so I could check another one out in person. Since I'm new to sailboats it's been interesting so far! This forum has been great though because everybody has been so nice and open to my questions, etc.
 

sleather

Sustaining Member
That's our job!

Just add a bunch of photos to that "cool" album and we'll check'er out "remotely";). Judging from the size of the angles & number of bolts I would say it's "good-to-go"! Check that ALL the bolts are tight(both sides of the boat) & inspect for any cracks @ the bends in the angles.

I love this site, "problem solving @ it's BEST"

Hmmmm, perhaps a trip to Austin?:egrin:
 

Mark F

Contributing Partner
Blogs Author
Hi Ivan,
My hatch was fairly smooth. It did have a bit of a texture in the non gelcoat center (yellowish area). But I think that was from 40 years of weather! The paint hardly made a difference down below with regard to light. Before I painted it if you looked up at the hatch from below the light coming through was blotchy and uneven. That did not change after painting. I painted the entire hatch (actually the entire boat) because the gelcoat was bad. It looks like your boat's gelcoat is in good shape, so masking and painting would probably be the way to go.
 
Top