• Untitled Document

    Join us on April 26th, 7pm EST

    for the CBEC Virtual Meeting

    All EYO members and followers are welcome to join the fun and get to know the guest speaker!

    See the link below for login credentials and join us!

    April Meeting Info

    (dismiss this notice by hitting 'X', upper right)

Stainless coach top hand rails

Status
Not open for further replies.

Tom Metzger

Sustaining Partner
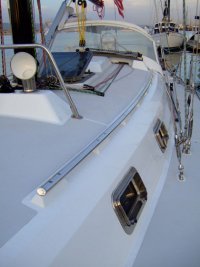
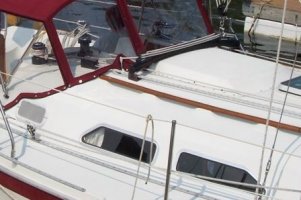
Has anyone with a mid eighties boat replaced the teak hand rails with stainless rails? I have removed the rails on my 1987 E-34 so I can refinish them, and have been wondering if I should replace them with stainless elliptical tubing to save having to do this again in the future. It is very difficult to properly maintain the underside of the teak on the boat.
 

Attachments

  • Dodger 001A.JPG
    Dodger 001A.JPG
    55 KB · Views: 224

Chris Miller

Sustaining Member
I hate to say it, but...

this almost sounds like a job for plasteak :headb:
I've never tried the stuff, and was annoyed when that woman kept spamming us with it- but it might be an option?
Chris
 

HGSail

Member III
I'm pulling my rails off right now to refinish them. When I put them back on, I'm going to drill all the way thru and mount teak rails on the in side. This way it is easy to remove them for refinishing, Also it will give me something to grab on to in the inside of the boat. Plus this will make it alot stronger.

P.S. I feel stainless is to cold. I like the warmth of teak.

Pat
E29
'73
#224
Holy Guacamole
 

Emerald

Moderator
Hi,

I agree with liking the warmth of teak - do cetol for easy maintenance instead of going to stainless. Also, I've seen very simple little covers that snap over handrails - they've got to be cheaper than buying stainless rails that would fit.

This may sound odd, and I know that there are lots of hard objects on boats, but somehow stainless handrails always seem to be staring at me saying, "I am going to knock your teeth out someday when you fall on me". I know a mouthfull of teak would suck, but something about that metal.....


-David
Independence 31
Emerald
 

cawinter

Member III
Pictures please

Tom,

Good stuff. Do you have pictures of the underside? Did you pull the headliner to get to the nuts/plates? I heatgunned the rails a few years ago and went with Cetol Light every year. Looks good from 6 feet away but we all know there is more lurking in the core...
 

Tom Metzger

Sustaining Partner
Ah - youth!

Chris - You are a very young man, and some day you will learn the way of the world. :rolleyes:

The space just to the right of the photo of the rail on my post is a diagram of the backing plate. :devil:

Actually, the rail is not thru bolted. There are #14 sheet metal screws under the plugs and a whole lot of 5200 behind the rail. The removal was not fun. I used a sharpened scraper with a large hammer to cut the 5200 on the top and the underside of the rail. The curve on the lands is about a one inch radius.

I should have mentioned that my posts only apply to the mid-eighties vintage boats; not the dash 2 boats and earlier.
 
Last edited:

Kevlarpirate

Member II
Stainless is slippery

I have found that it takes a stronger grip to hold when Stainless is wet. If I did it I would have the stainless bead blasted or somthing to get a tooth on the metal
 

Don Smith

Member II
I agree that stainless steel handrails look and feel cold, and they're slippery too. They look ok on Bayliners, but not on Ericsons, IMHO.

Why would anyone want/need to maintain the underside of teak handrails anyway? Mine are beautifully varnished on the tops and sides, and "rough" on the bottom. They look great and provide a good grasping surface. Seems to me that finishing the undersides of this style teak handrail is like polishing the soles of leather shoes. It adds nothing it and it makes them slippery!

Captain Don
Gitana - E26
 

stbdtack

Member III
Mine were easy to replace. I wont argue with the teak lovers as it does look great when its finished nicely, I just dont want the extra maintenance.

I've still got all my teeth too....:egrin:
 

Attachments

  • ssrail.jpg
    ssrail.jpg
    65.3 KB · Views: 199

cawinter

Member III
Ah, Tom, I always enjoy your comments, you know. I couldn't help but ponder the lack of specificity in your first note (which is usually your hallmark). ;)

Thanks. This was very helpful. I studied the second picture in detail!:boohoo:

I have enough work right now and will stick with the cetol...
 

Tom Metzger

Sustaining Partner
Ben - Did you buy the hand rails made up or did you do the work yourself? I am interested in the material you used, size and wall thickness, and any other details you might want to give up.

Thanx.
 

stbdtack

Member III
I had a local stainless shop make them. I made a pattern of the stand-offs using a long piece of kraft paper. OD dimensions are 1.35x.88". I cant remember the wall thickness but I only had one choice in that size. The tubing came from a regular supplier. The shop didnt know about it but the supplier had it in stock.

I think the key to it being a simple install was that the shop ran them through a tubing roller to get a prebend to fit my pattern. Otherwise the tubing doesnt want to bend on the wide axis easily. They just laid properly on each mount with no wrestling. I had them weld the ends shut with an angle and polish.

I drilled the holes on a drill press then counter-bored the top hole for a #14 oval head sheet metal screw. Cant remember the length but they just barely protrude on the underside of the deck. Maybe 3.5 or 4"? Sealed the fasteners and holes with Sika-Flex.

Not sure the cost as the PO had a $300 credit with the shop and we agreed to call it even if he made these for me. I remember hearing the price per foot and it wasnt that bad.
Really a lot easier job than i was prepared for......
 

stbdtack

Member III
I had a local stainless shop make them. I made a pattern of the stand-offs using a long piece of kraft paper. OD dimensions are 1.35x.88". I cant remember the wall thickness but I only had one choice in that size. The tubing came from a regular supplier. The shop didnt know about it but the supplier had it in stock.

I think the key to it being a simple install was that the shop ran them through a tubing roller to get a prebend to fit my pattern. Otherwise the tubing doesnt want to bend on the wide axis easily. They just laid properly on each mount with no wrestling. I had them weld the ends shut with an angle and polish. I stopped one before the last mount aft as I didnt want to have the dodger fitted around the rail. I have a handle on the outside of the dodger anyway so its within reach.

I drilled the holes on a drill press then counter-bored the top hole for a #14 oval head sheet metal screw. Cant remember the length but they just barely protrude on the underside of the deck. Maybe 3.5 or 4"? Sealed the fasteners and holes with Sika-Flex.

Not sure the cost as the PO had a $300 credit with the shop and we agreed to call it even if he made these for me. I remember hearing the price per foot and it wasnt that bad.
Really a lot easier job than I thought it would be ......
 
Status
Not open for further replies.
Top