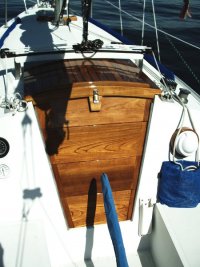
I'd like to sharpen up the look of the companionway hatch on my 27. The hatch is in good structural shape, but the large piece on top look to be a teak plywood that has been sanded through over the years. What am I getting into if I try to replace just that piece? Could I just start by prying up one corner that is raising up, and pull the whole piece up and the replace? Or is that going to require taking the whole thing apart? And does anyone know the thickness of the piece? There's a good supplier in town that advertises 1/8" and 1/4" teak plywood.
Of course I could leave well enough alone and varnish what I have but what's the fun in that. Thanks. Jay


Of course I could leave well enough alone and varnish what I have but what's the fun in that. Thanks. Jay


")