• Untitled Document

    Join us on April 26th, 7pm EST

    for the CBEC Virtual Meeting

    All EYO members and followers are welcome to join the fun and get to know the guest speaker!

    See the link below for login credentials and join us!

    April Meeting Info

    (dismiss this notice by hitting 'X', upper right)

To varnish or not

csoule13

Member III
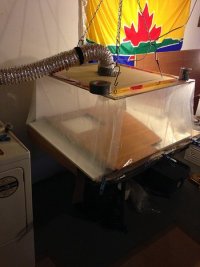
Stripping and sanding the cockpit drink holder and table, and getting ready to finish it. I've done cetol w/ the clear coat finish on the hand rails and drop boards previously, but not sure if that's going to work as well on these items. The flip side is I don't have an environment that could remotely be considered ideal for varnishing. Decisions, decisions.

What's the peanut gallery think?
 

Loren Beach

O34 - Portland, OR
Senior Moderator
Blogs Author
I have used Cetol "light" on outside teak for years. Not particularly attractive, but it can last several seasons.
Prefer Varnish, but do not like the shorter life.
:esad:

No simple answers.
 

tenders

Innocent Bystander
The proper yardstick for the suitability of Cetol is not a picture in a coffee table book of classic wooden powerboats.

The proper yardstick is, once done, do you survey your boat and see more pressing cosmetic projects than improving Cetol in pretty good condition? If so, the Cetol is a success: the woodwork is not the weakest link. There is little point in spending a bunch of time varnishing if something else is going to be the cosmetic bugaboo that catches your eye.
 

csoule13

Member III
I find Cetol looks fine, my concern was the physical banging around the drink holder is going to get. Is the cetol lear coat a hard enough finish? Or, most likely, who cares, since a light wash and scuff, and recoat the gloss.
 

Christian Williams

E381 - Los Angeles
Senior Moderator
Blogs Author
Preparing a teak drink holder for varnish is a pain in the butt. Maybe a table, too, if it's bad off. Just a lot of work--and prep is key in this case.

So if you want it perfect, all the effort is in that, followed by wood bleach to equal levels throughout.

After all that, I'd use Interlux Schooner varnish or similar, numerous coats to build up an impressive depth and luster. (I'm not familiar with Cetol)

The whole idea of varnish on these small projects is perfection.

Without a workshop, I'd be tempted to use teak oil. After all the prep, couple coats and you;re done.

Louis Sawzall (that's the way I and Popeye pronounces it) knows all: https://www.youtube.com/watch?v=_VdFzj48BOQ
 
Last edited:

aj vollmer

Member I
Another product to consider...

I've been using a product called TeakGuard and am impressed with it (http://myboatstore.com/teak-guard).
It is easy to use and I like the reasoning behind the product as it addresses the issue of best coating for woods with natural oils and resins and why traditional finishes fail.

Best to start with their kit that has cleaner, protectant and tools, though the complaints on Amazon about too much "kit" and not enough product ring true. https://www.amazon.com/Teak-Guard-Finish-Kit-oz/dp/B00340BJ8U/ref=pd_sim_200_4
What I've learned so far is to make sure you prep the wood as per their instructions (don't plug the pores with fine sanding unless you spend extra time cleaning out the fine dust) and use many thin coats. The product dries fast so multiple coats in one day is easy to do. Three to four coats is fine for a good finish and 6 for a more varnish like appearance. Avoid drips that harden because while easy to remove, it takes effort to match the finish to the rest of the treated area.

I've only used it for a few months so can't speak to long-term durability. The web however has a number of threads on the product and it seems to last. Some folks also find the product's color a bit off from the natural wood. But for me the ease of use and promise of better protection and longevity make it worth a try.
 

csoule13

Member III
Thanks all. Christian, as usual, gets to the heart of it all. Perfect is not the goal. Improvement from the half chipped, half greyed neglected item that the boat came with is. Also, never have I wished for a garage or workshop more than since I've become involved in boat projects.

Many teak oil/selaers get good reviews online, and seem to be the way to go. Salud!
 

Grizz

Grizz
Another cup holder option...

I witnessed a friend's yearly struggles with sanding, prepping and varnishing/sealing the helm cup holder for his 1985 Passport 40, he never quite satisfied with the results. The watching wasn't so bad, it was the 'listening' to his constant grumblings that eventually tipped the scale...

So, unbeknownst to him, measurements and pictures were taken to create the 'All Weather No Varnish Cup Holder®', (perhaps appearing on Shark Tank soon...not really). It fits snug within his binnacle space, is sized to accept an array of cups & mugs and eliminates any/all sanding/prep/varnishing needs.

From scraps of Corian® from a kitchen remodel emerged this 'fit for purpose' beauty...and silenced the grumblings for a while.

Fabricated with standard woodworking equipment (table saw, drill press, sabre saw and router) and 'glued' together with Corian® approved epoxy, a material we ALL call 'epoxy', it was completed in a weekend. Expedited because it required NO varnishing time. Assembled, epoxied and done.

Vixen Cupholder.jpg
 

Gary Holford

Member II
Regarding an environment to do varnishing, last winter I McGyvered a work space with my dryer hose and a small inline fan cannabalized from a old computer.
 

Attachments

  • vent small.jpg
    vent small.jpg
    46.4 KB · Views: 182

Loren Beach

O34 - Portland, OR
Senior Moderator
Blogs Author
Help

Regarding an environment to do varnishing, last winter I McGyvered a work space with my dryer hose and a small inline fan cannabalized from a old computer.

After admiring your work, I realized that I was having an ignorance attack and could not figure out if that dryer hose was taking air outside and putting negative pressure on your enclosure... or was using dryer heat to fast-dry the varnish. :rolleyes:

(not sure whether I took the Red pill or the Blue pill today. Reality in the Matrix can be confusing!) :)
 

Christian Williams

E381 - Los Angeles
Senior Moderator
Blogs Author
Nice job, Grizz. Did you use a small, handheld router to round over the cupholder holes?

I think I need to get a small router.
 

tenders

Innocent Bystander
That's a great idea! I love the effect moist, linty air has when blown over fresh varnish!

Chicks really dig flocked hardwoods.
 

Grizz

Grizz
Full Size Router

Christian: the picture shows the completed holder on a rubber matt, which offers sufficient resistance when routing so the piece doesn't move. There's a few different size, different weight and styles rolled up in the rafters of the basement. If there's a chance of movement, it's time to unroll the heavy-duty double sided tape and cut to fit to make sure there's no chance of movement. Routing is a 2-handed job!

Woodworking tricks and skills pay dividends with boat projects, part of what I view as the 'problem solving' allure. But you knew that already...
 

tenders

Innocent Bystander
Well, seriously, doesn't your dryer exhaust line have a lot of lint in it? Mine has to be cleared out every 9-12 months and is never really "clean."
 

Grizz

Grizz
Porter Cable 1001

Christian: pulled the Porter Cable model #,1001 for those keeping track, but I'm not sure if it counts as a 'small' router. It's been up to an array of tasks thus far. And...I can pull the base and mount it upside down on a purpose-built table, turning it into a shaper when necessary. It WILL create prodigious amounts of dust and shavings, best for the garage and not basement. If momma ain't happy...
 

toddster

Curator of Broken Parts
Blogs Author
Come to think of it, I do have a little "trim router" in the back of the power tool cabinet. It's like a can of V8 juice.
"D'Oh! I coulda used the trim router!"
 
Top