This actually turned out to be a painless project
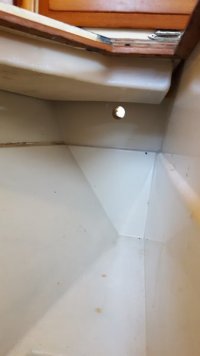
We decided on a Isotherm 2012 Compact classic. The draw and space requirements were closer to our needs than any other product. After measuring the volume of the of the existing rear ice box we decided to reduce the inside dimensions to get near 6 feet of total volume. We used small pieces of Pinksulate R5 to fill in the well at the very bottom and then continued with larger and larger pieces until we had two full sheets across the bottom and one full sheet across the starboard side (outside) wall. The foam can be cut with anything serrated. We used a surfoam rasp to get the angles and corners to conform.
The Pinksulate is a summer fix with plans to cast a new fiberglass skin inside the existing structure this fall. We put in a new drain through the foam and tied it into the original drain in the box. You can see the tube sticking up prior to being cut off. The evaporator plate was 32 inches long and we bent it over the provided curved form to end up with a 90 degree turn in the forward portion of the box. This meant we had to trim the shelves. The thermostat was placed up under the shelf as to be easy to reach and out of the way.

By using the tilt out drawer above the counter top for reference we were able accurately estimate where to penetrate the ice box from the outside. I was surprised to find 6 inches of insulation between the plywood bulkhead and skin of the ice box on the rear of the box. This hole was covered with aluminum tape and back filled with expanding spray foam.

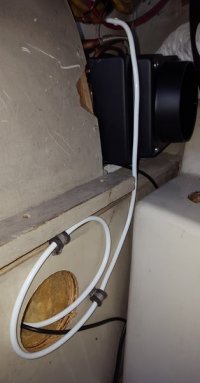
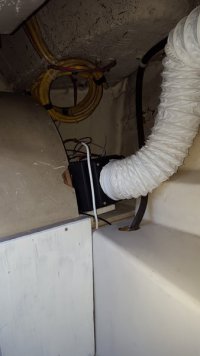
We installed the air cooled compressor on the top shelf in the starboard lazerette. This was the best location for the hard line to run and it keeps the unit out of harms way. By pressing the hard line into the corner of the fan shroud we hope it will not get bonked.

After making a standoff and a cover plate the starter battery can reinstalled without fear of crushing anything of value. We also ran a hose to the rear starboard transom vent. The wiring was 12 gauge and run to the refrigerator breaker on the 12 volt panel.

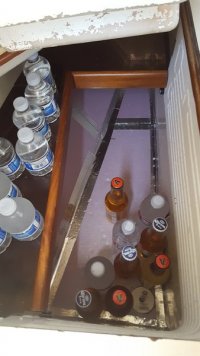
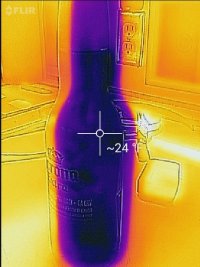
This was all accomplished on a Saturday. This is what we found in the fridge on Sunday morning:

We turned the thermostat down from 11 so that nothing will burst in our new fridge. We will see what we have next weekend.
Cheers,
We decided on a Isotherm 2012 Compact classic. The draw and space requirements were closer to our needs than any other product. After measuring the volume of the of the existing rear ice box we decided to reduce the inside dimensions to get near 6 feet of total volume. We used small pieces of Pinksulate R5 to fill in the well at the very bottom and then continued with larger and larger pieces until we had two full sheets across the bottom and one full sheet across the starboard side (outside) wall. The foam can be cut with anything serrated. We used a surfoam rasp to get the angles and corners to conform.
The Pinksulate is a summer fix with plans to cast a new fiberglass skin inside the existing structure this fall. We put in a new drain through the foam and tied it into the original drain in the box. You can see the tube sticking up prior to being cut off. The evaporator plate was 32 inches long and we bent it over the provided curved form to end up with a 90 degree turn in the forward portion of the box. This meant we had to trim the shelves. The thermostat was placed up under the shelf as to be easy to reach and out of the way.
By using the tilt out drawer above the counter top for reference we were able accurately estimate where to penetrate the ice box from the outside. I was surprised to find 6 inches of insulation between the plywood bulkhead and skin of the ice box on the rear of the box. This hole was covered with aluminum tape and back filled with expanding spray foam.
We installed the air cooled compressor on the top shelf in the starboard lazerette. This was the best location for the hard line to run and it keeps the unit out of harms way. By pressing the hard line into the corner of the fan shroud we hope it will not get bonked.
After making a standoff and a cover plate the starter battery can reinstalled without fear of crushing anything of value. We also ran a hose to the rear starboard transom vent. The wiring was 12 gauge and run to the refrigerator breaker on the 12 volt panel.
This was all accomplished on a Saturday. This is what we found in the fridge on Sunday morning:
We turned the thermostat down from 11 so that nothing will burst in our new fridge. We will see what we have next weekend.
Cheers,
Attachments
-
 20160522_121113r.jpg40.5 KB · Views: 508
 -
 20160521_104350r.jpg19.2 KB · Views: 499
 -
 20160521_164556r.jpg29.3 KB · Views: 504
 -
 20160521_172241r.jpg29.6 KB · Views: 512
 -
 flir_20160522T121546.jpg51.1 KB · Views: 494
")