HerbertFriedman
Member III
How do you inspect the chain plates on a E34 with the triaxial grid hull. I cannot even see the attachment points in the hull let alone inspect them for corrosion.
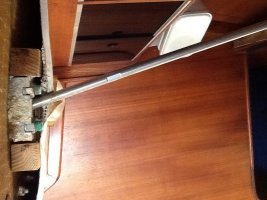
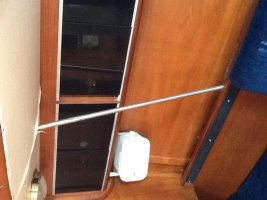


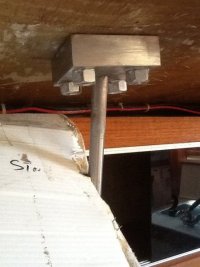
thanks Charlie for the photos, detailed explanation and nice ride on the Wed nite race. The Olsen/Ericson 34 and the E34 are indeed quite similar in constructions details. My E34 has the the four side stays set up differently, two in the middle, one fore and one aft, so if mine leak, there is the possibility of having to change 6 blocks not just two, ugggh. I have no indication of any leak, or appearance of white powder, probably aluminum oxide, unfortunate that Ericson would have chosen to use aluminum blocks with SS rods and deck fitting, just asking for trouble. I can access the aluminum blocks via the zippers in the headliner but I can only reach them, not see them but I do have a nifty endoscope camera and I will look shortly.
Thanks again.
Agreed. I think it might be worth adding that testing the u-bolts with a dye penetrant might be prudent vs. relying on a visual inspection alone. Another option might be sending them out for magnaflux testing. Sometimes small cracks may be difficult to spot with the naked eyeYour aluminum blocks would have to be in quite bad shape to fail. (Not saying they're not) The u-bolts that pass through them however, should be replaced or at least closely inspected on a regular schedule along with your standing rigging. There are several documented instances here on the site where they have failed.
Several of us have replaced them.
http://www.ericsonyachts.org/infoex...te-U-Bolts-and-Replacements&p=90313#post90313