We're firmly in the putting-things-back-together stage of our work this winter and with that comes installing a new sink. This one was high on my wife's list. The old sink wasn't too bad, but it was small and somewhat flimsy. We found the new one on Amazon:
Sink:
Drain (the one included with the sink had plastic parts):
Tail Piece:
Faucet:
First step was removal which was the impetus for finally pulling the trigger on this portion of the project. I needed the sink out of the way to gain better access to the plumbing and thru hulls I was replacing. the removal was covered under this thread:
 ericsonyachts.org
From there, the new sink sat in my garage for 3 months while I worked on everything else. I finally got to the install part this weekend. I started by cutting a template out of some scrap particle board using a track saw for the majority of the cuts and a jig saw to finish up the corners:

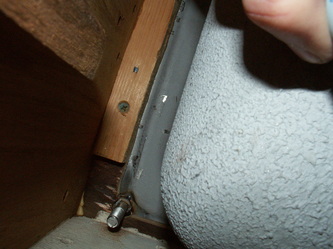
The fit was good with plenty of room for final adjustment, but the tabs to hold the sink to the counter were in the way. I wanted to install some long threaded rod and anchor the sink to the cabinet from below where they would be easy to remove, but I ultimately decided on using sealant along the flange instead. There was some butt puckering while grinding on the new sink, fortunately, it's much thicker metal than the sink that came on the boat, so I had some room to make mistakes.

At the boat, I screwed the template down and used a jig saw to rough cut the opening and a multi tool to finish it off. I wanted to use a palm router with a top bearing flush cut bit, but quickly realized the template was too close to the fiddles and bulkhead to fit the router base. The opening is rougher that I wanted, but no one will notice once the sink is in.

And here's where the project sits:

Now I just need to paint the cabinet, install the hardware, and bed it in sealant. I think this is going to be a huge improvement. Another great write up on this project can be found at:
Sink:
Drain (the one included with the sink had plastic parts):
Tail Piece:
Faucet:
First step was removal which was the impetus for finally pulling the trigger on this portion of the project. I needed the sink out of the way to gain better access to the plumbing and thru hulls I was replacing. the removal was covered under this thread:
Removing galley sink
I am considering--considering--removing the galley sink so as to change the water lines to the galley foot pumps. Anyone done this recently? The best chronicled saga is Loren's, of a few years ago. He found the sink bedded in 5200, with studs, and used heat and wedges and patience. He then sent...
From there, the new sink sat in my garage for 3 months while I worked on everything else. I finally got to the install part this weekend. I started by cutting a template out of some scrap particle board using a track saw for the majority of the cuts and a jig saw to finish up the corners:
The fit was good with plenty of room for final adjustment, but the tabs to hold the sink to the counter were in the way. I wanted to install some long threaded rod and anchor the sink to the cabinet from below where they would be easy to remove, but I ultimately decided on using sealant along the flange instead. There was some butt puckering while grinding on the new sink, fortunately, it's much thicker metal than the sink that came on the boat, so I had some room to make mistakes.
At the boat, I screwed the template down and used a jig saw to rough cut the opening and a multi tool to finish it off. I wanted to use a palm router with a top bearing flush cut bit, but quickly realized the template was too close to the fiddles and bulkhead to fit the router base. The opening is rougher that I wanted, but no one will notice once the sink is in.
And here's where the project sits:
Now I just need to paint the cabinet, install the hardware, and bed it in sealant. I think this is going to be a huge improvement. Another great write up on this project can be found at:


") Excellent work. Really enjoying the photos documenting everything.
Excellent work. Really enjoying the photos documenting everything.
